RNS Logo

rns.recipes

◈ 9ce92808be498e9e05590ff27cbfdfe4
RNS 1.5.5 released https://pypi.org/project/rns/

Aethernode and Aethermobi - building blocks for urban deployments

Tutorial Showcase LoRa RNode

Started by aetherlab ·

edited #1

Hello!
To mark me appearing here, I want to share the repo for the two main projects I work on now:

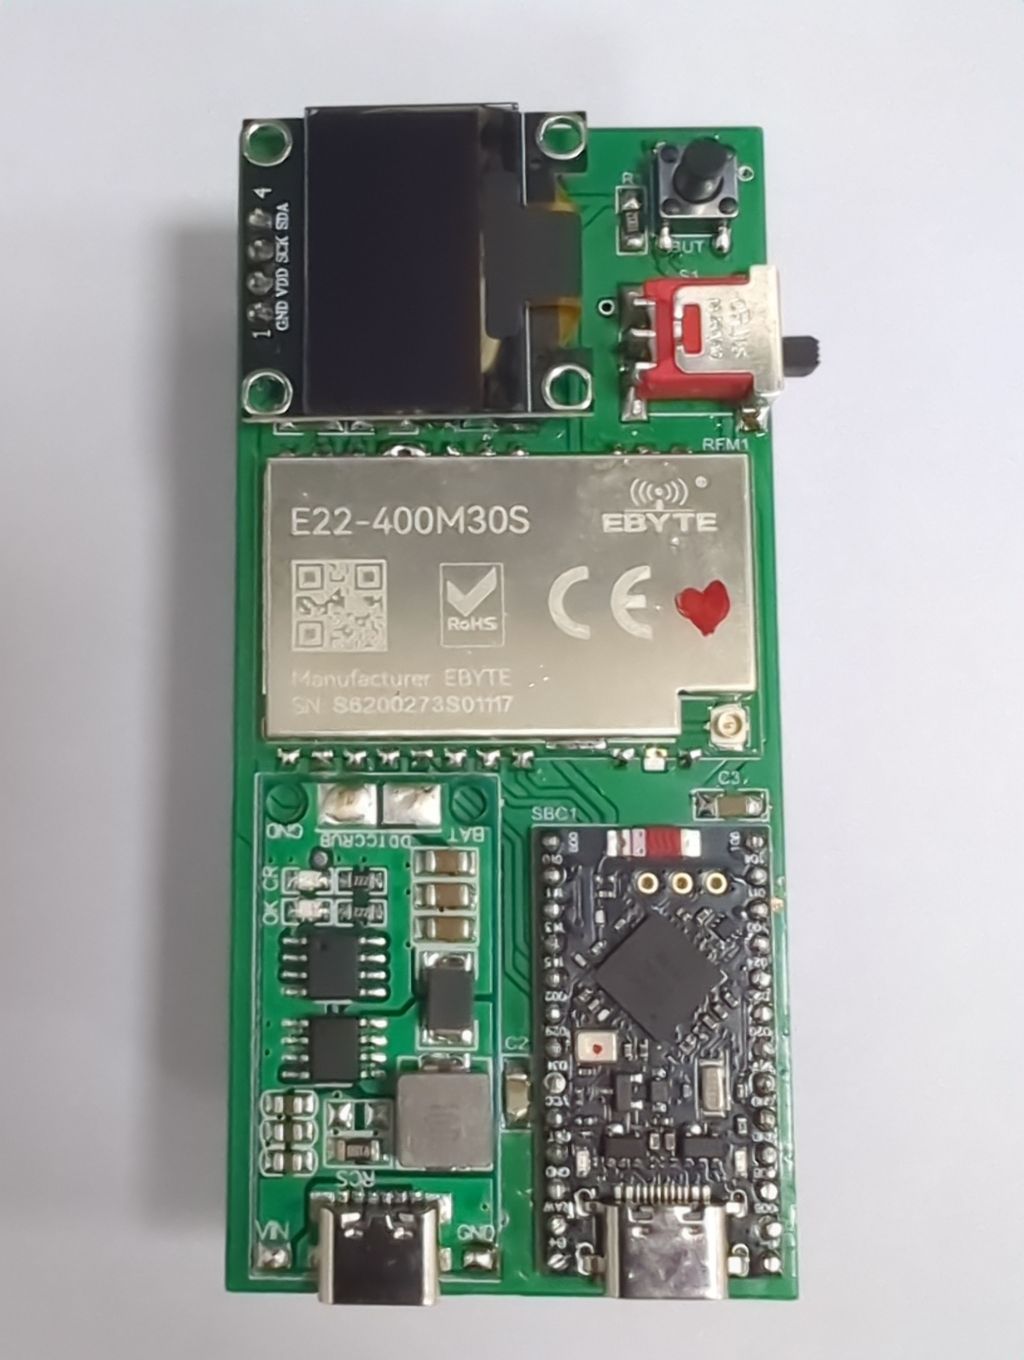
  1. aethernode is a base-station unit for Reticulum LoRa networking
  1. aethermobi is a high-power mobile node - https://github.com/ahedproductions/aethermobi

✪ We host git.aetherlab.org at
https://git.aetherlab.org/explore/repos

✪ We host an RNode flasher at flasher.aetherlab.org at
https://flasher.aetherlab.org/explore/repos

✪ We host rns.sofia Propagation Node at
1e96a12e2ac59bfebd604a6e3cb95a68

✪ We host rns.sofia EchoBot at
97d4013e7a75cf64cfeae7d0e892b3aa

✪ We host rns.sofia TCP at
-rns.sofia-
BackboneInterface
IP: 193.193.182.147
Port: 4242
Transport Identity f28806251f4c62021da8e55c687107a4

✪ We run a LoRa network at
Frequency: 438.15MHz
BW: 125kHz
SF: 9
CR: 7

As an RF/PCB Design professional I will be happy to share knowledge with the community.
Bill, LZ1SWE
fc84a309506a48d32b478cb1299dc351:/page/index.mu

aetherlab 509723a0ccb60610...
#3

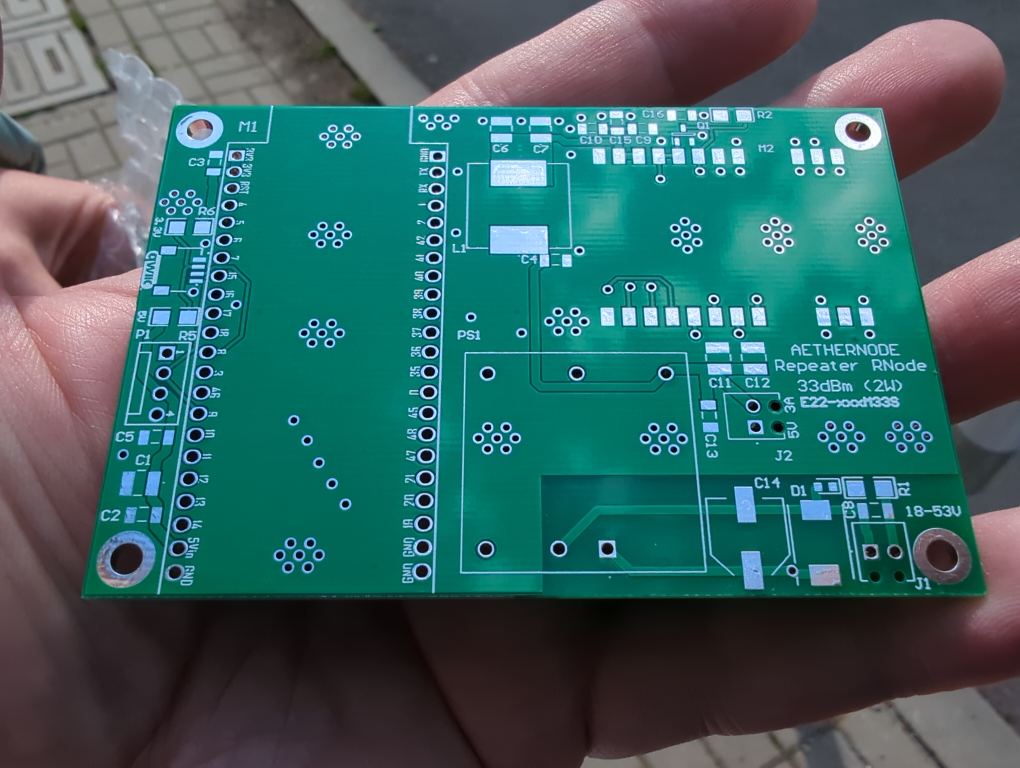
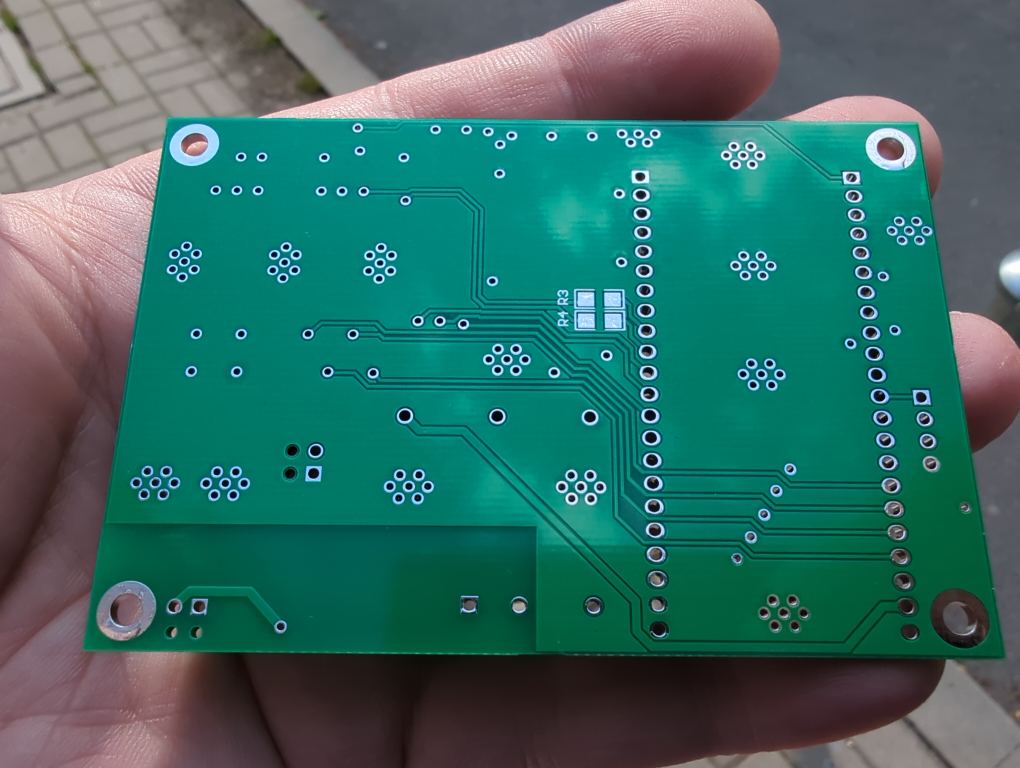
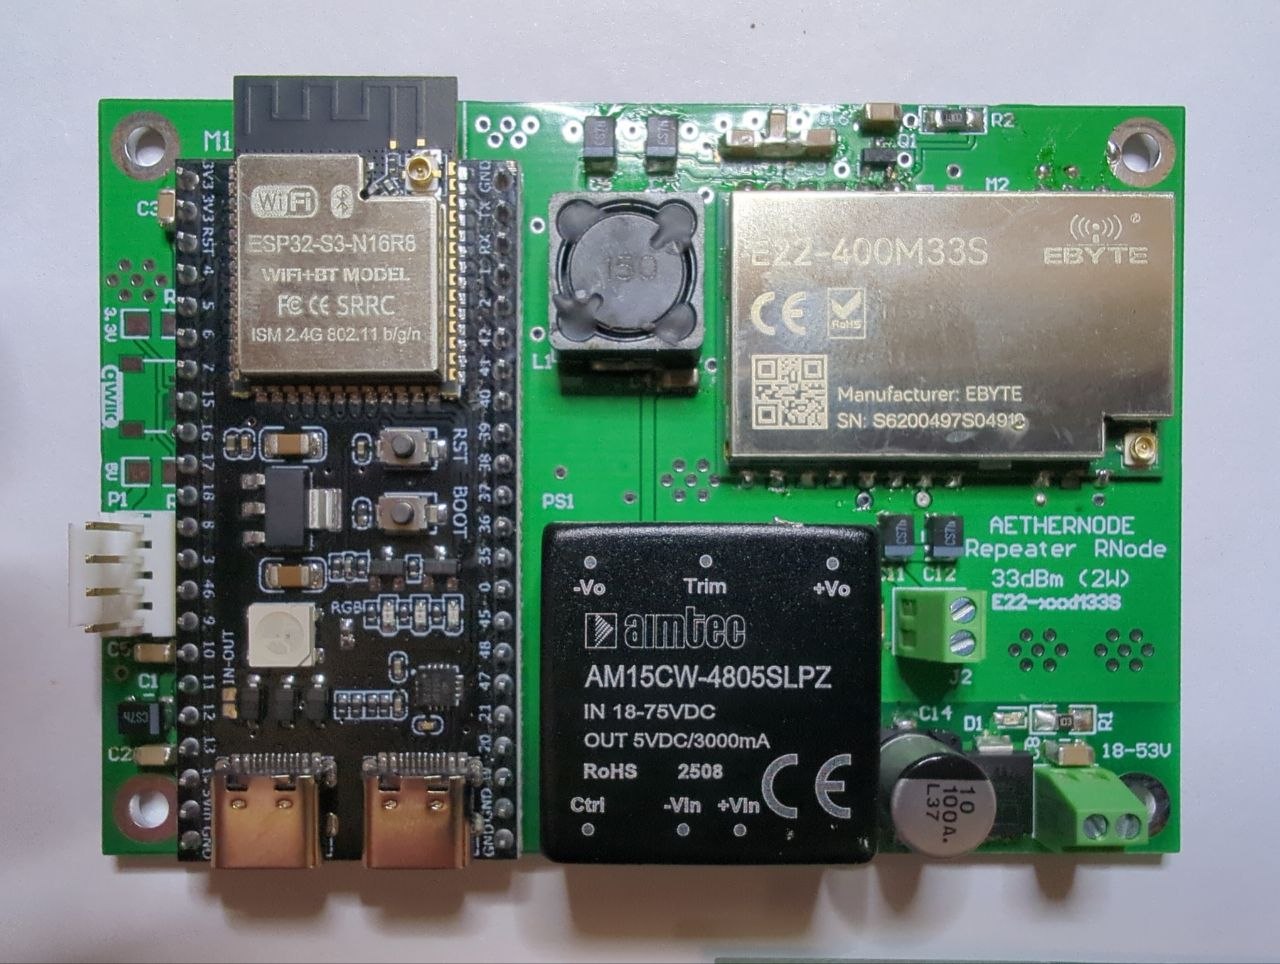
Aethernode S3 PCB's have arrived! I hope I get them up and running soon. Hats off to JlcPCB!
S3PCBTOP.jpg
S3PCBBOT.jpg

aetherlab 509723a0ccb60610...
#5

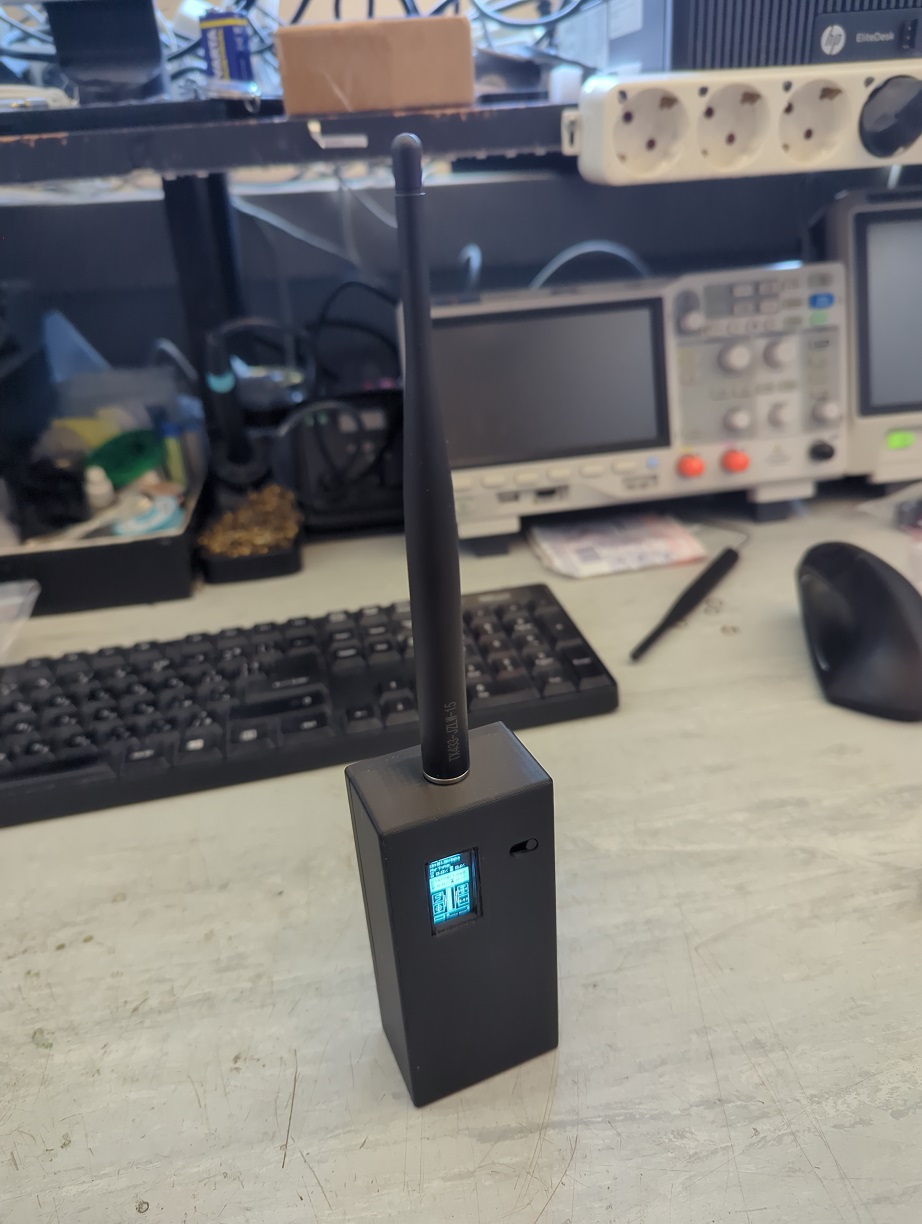
Box fits!
Will print in ASA. :) I will share STEP files.
IMG_20260512_191644_415.jpg
IMG_20260512_180130_028.jpg

joakim b918e659eeedac9a...
#6

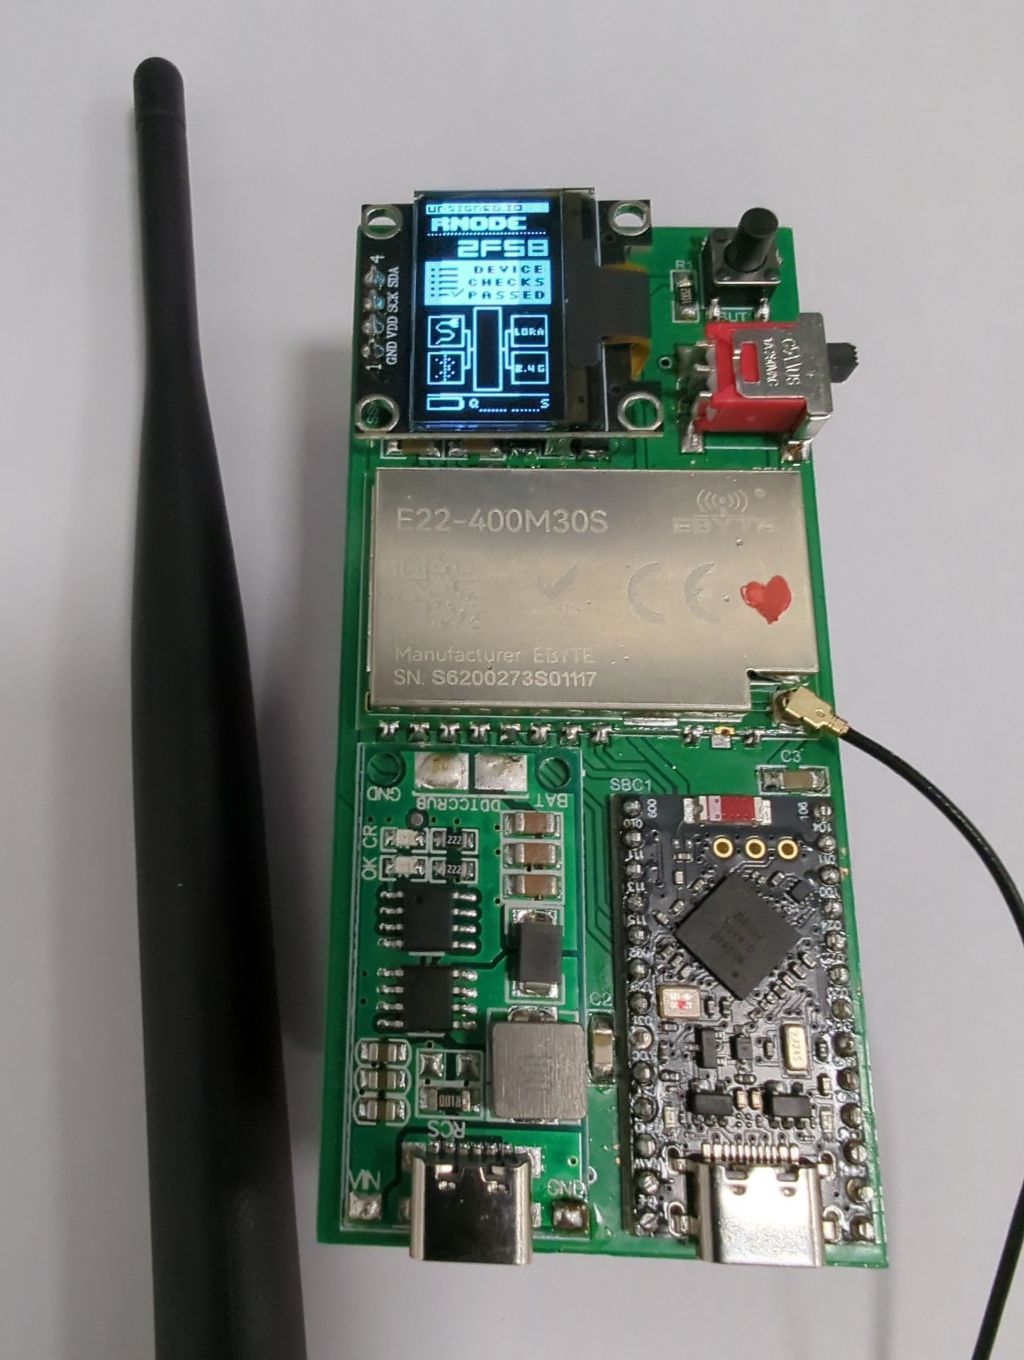
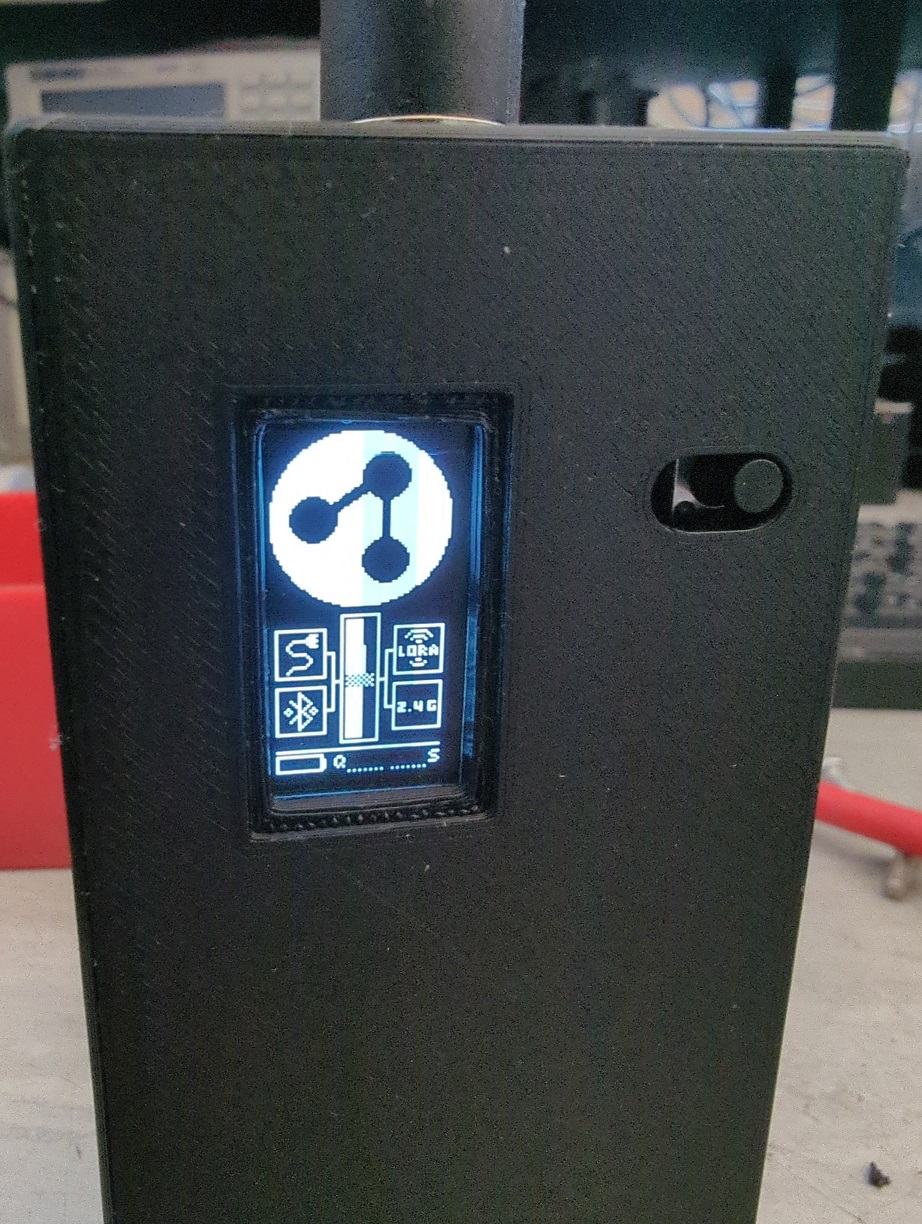
That is one powerful little brick! Looks good in black :)

It's great to see the progress of your projects, nice work!

aetherlab 509723a0ccb60610...
edited #7

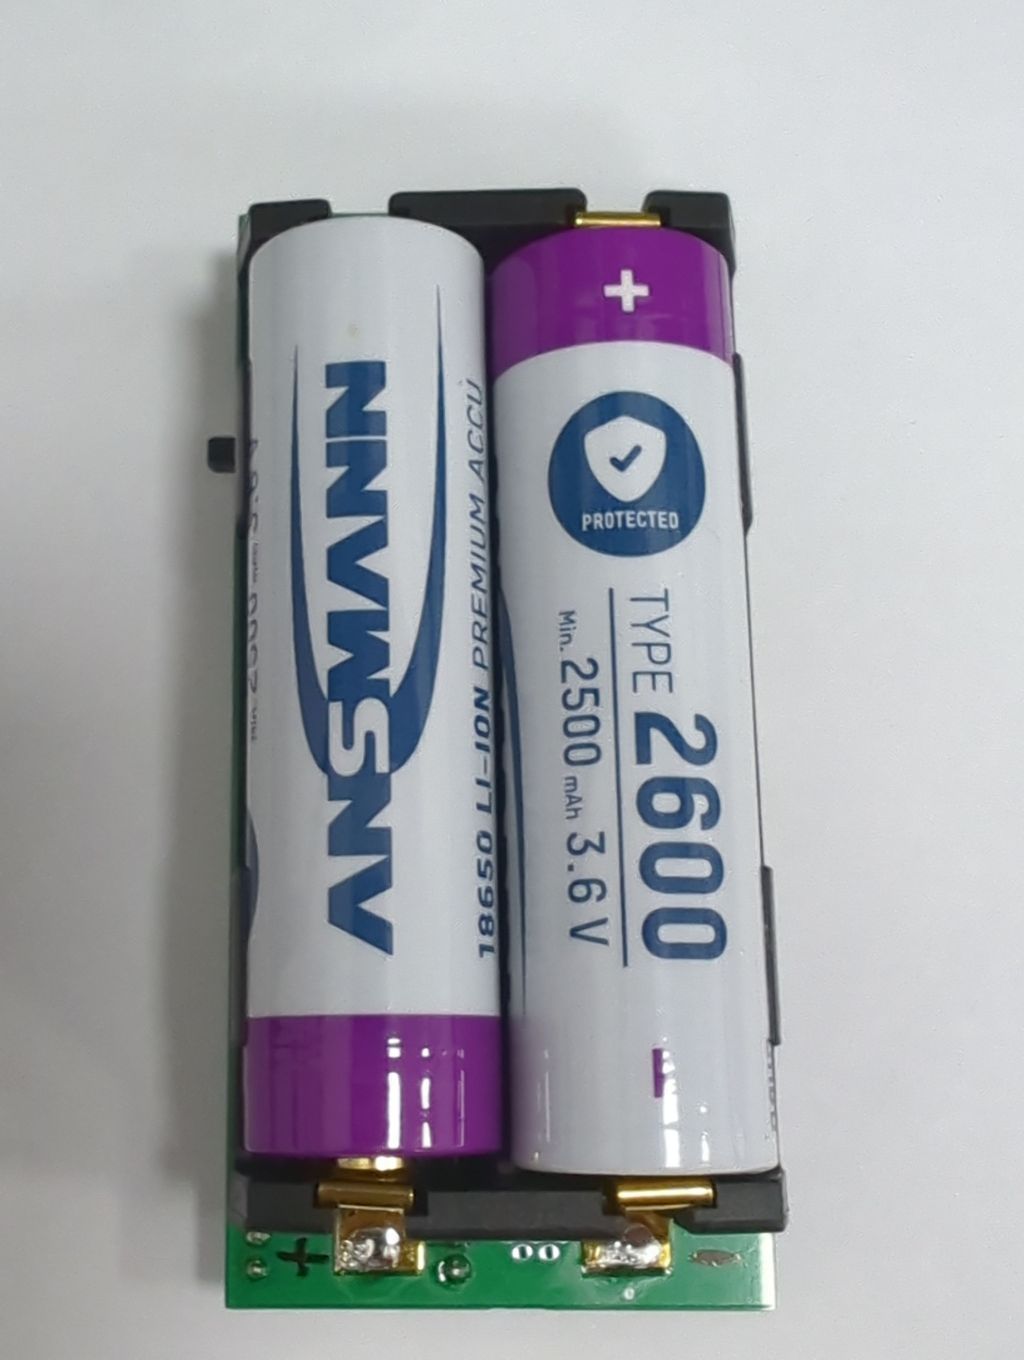
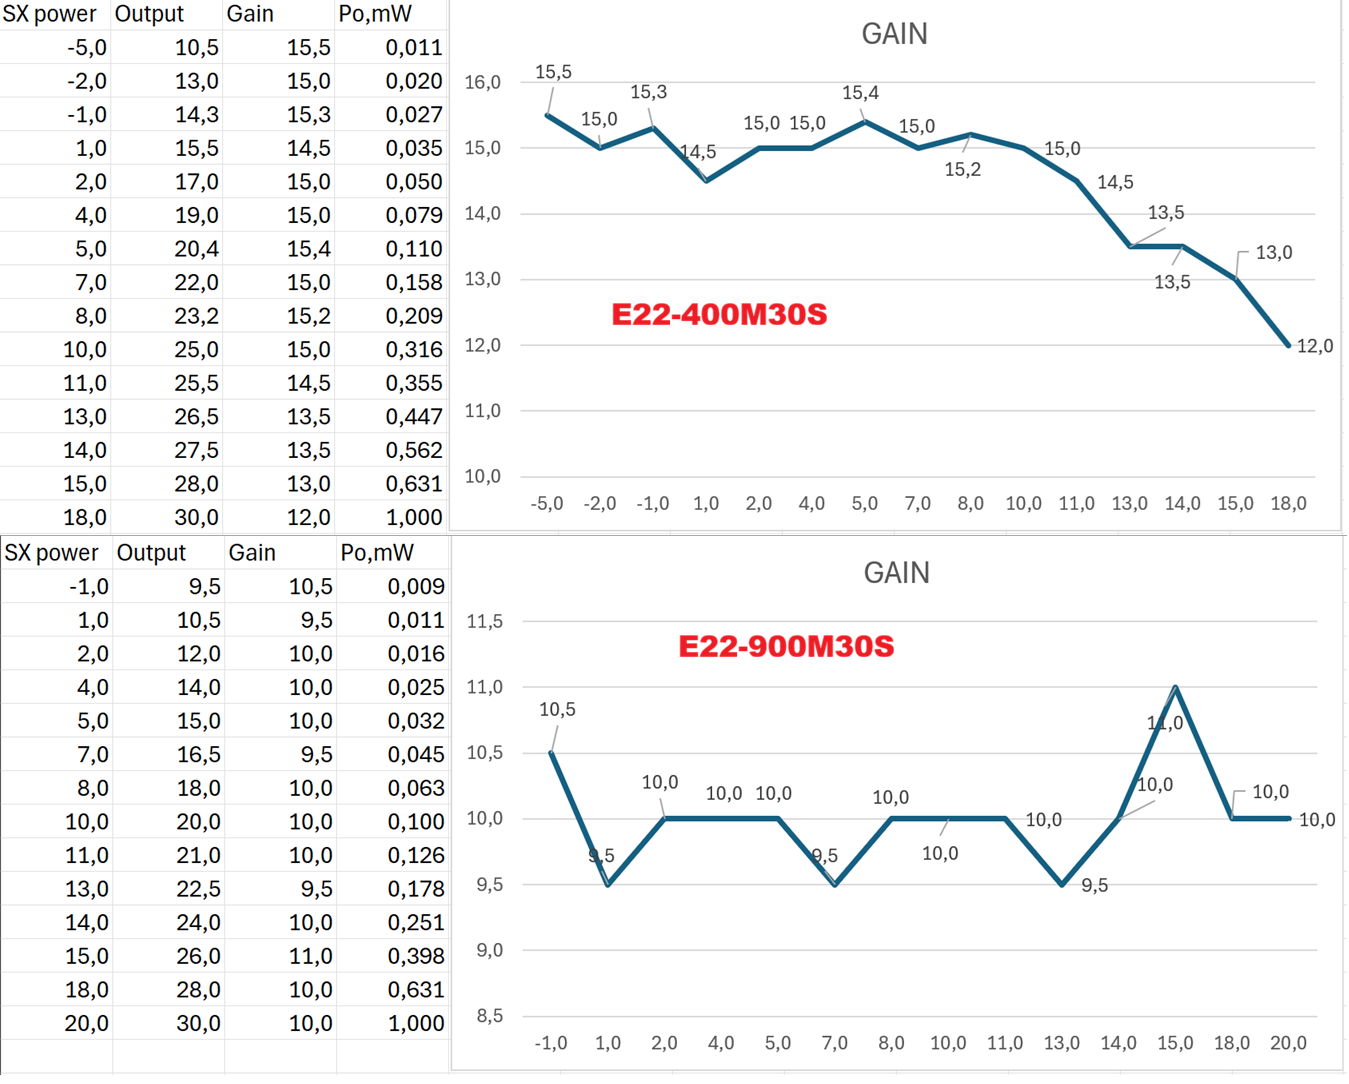
Yesh! It feels heavy and dense, this one, in ASA it will be even more like this. The ability to have a good antenna with actual gain and real power, after all even with all those cell towers around you, your mobile's cellular modem is actually 1W or more, is crucial in urban areas, where one cannot place too many stationary nodes. This will give you oomph when you need it, keep you consumption very low, when you don't. The batteries will last for days even on 1W and moderate traffic. Setting the power on this one is done like this:
image.png
On the left is the value you put in Sideband, on the right - the output power you will get from the 30S modules.

aetherlab 509723a0ccb60610...
#10

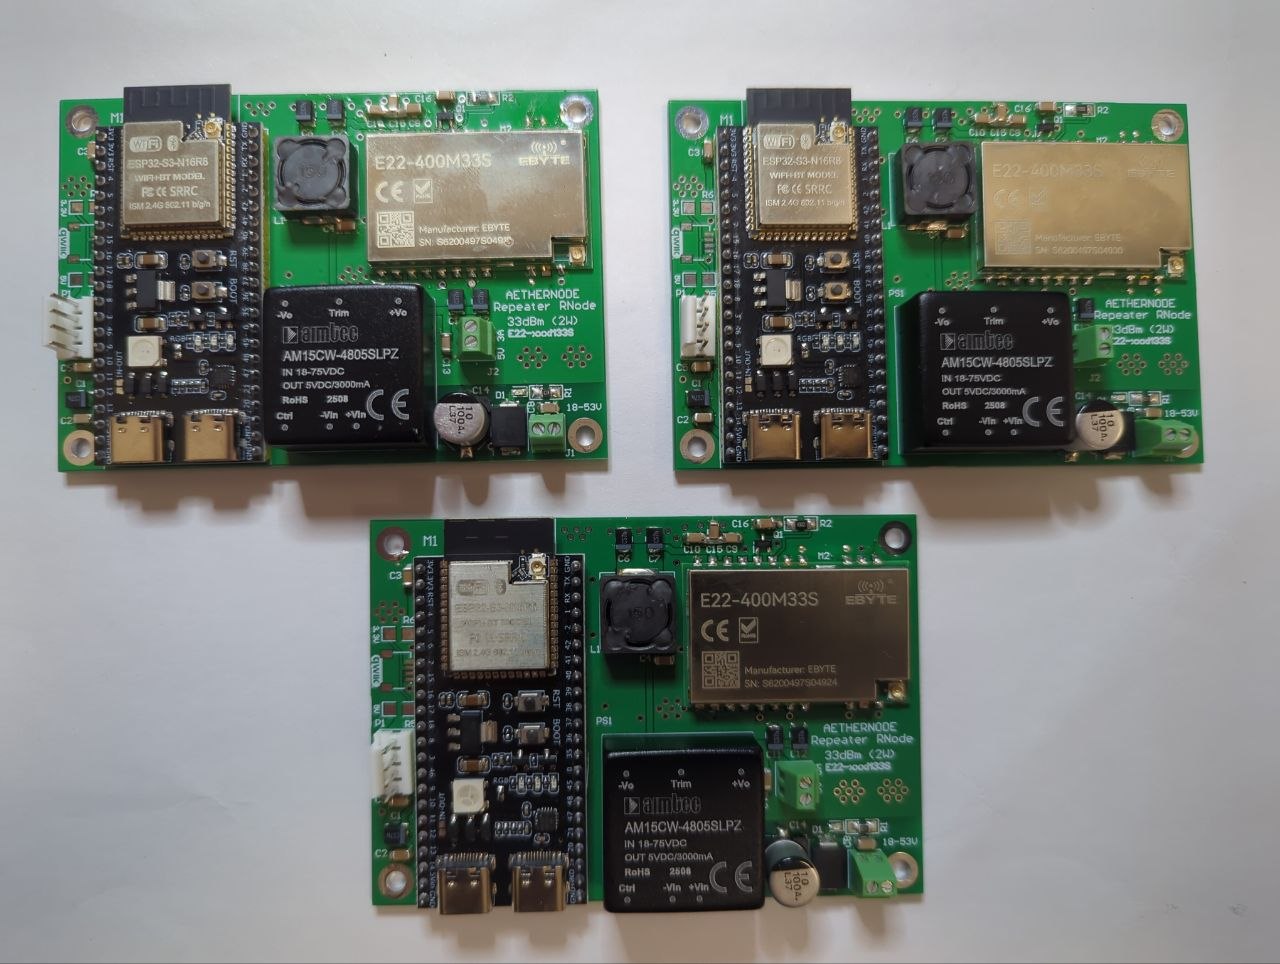
First aethernode S3 is being brought to life. It will become the 3-rd deployment in Sofia city soon, widening the LoRa coverage and allowing a new set of environmental sensors online.
IMG_20260525_104306_662.jpg

aetherlab 509723a0ccb60610...
edited #11

Sofia 2 is deployed! It has already returned lots of data from it's env sensors. I have done a preliminary coverage test run. I truly hoped to get roof access for this one, but people are... people.
IMG_20260618_164627_142.jpgIMG_20260618_164954_543.jpg

aetherlab 509723a0ccb60610...
edited #12

Sofia 3 has been deployed last night! Now we have the first set of sensored nodes up, marking a milestone. Wardriving and coverage mapping will commence in due time, thanks to Nickie's indispensable toolset - the wardriving bots, app and maps. (https://git.rns.moscow/explore/repos). I will post pictures from the site, as soon as our generous host takes them - we worked well into the dark hours.
I want to extend my deepest gratitude towards lootus - without her engineering skill, open mindset and well thought out and timed advice's, the install would have never been that clean! I am truly thankful she is part of our community.

Anonymous
#13

aetherlab wrote:

Sofia 3 has been deployed last night! Now we have the first set of sensored nodes up, marking a milestone. Wardriving and coverage mapping will commence in due time, thanks to Nickie's indispensable toolset - the wardriving bots, app and maps. (https://git.rns.moscow/explore/repos). I will post pictures from the site, as soon as our generous host takes them - we worked well into the dark hours.
I want to extend my deepest gratitude towards lootus - without her engineering skill, open mindset and well thought out and timed advice's, the install would have never been that clean! I am truly thankful she is part of our community.

That git link appears to be messed up

aetherlab 509723a0ccb60610...
#14

Thanks! Fixed!

#15

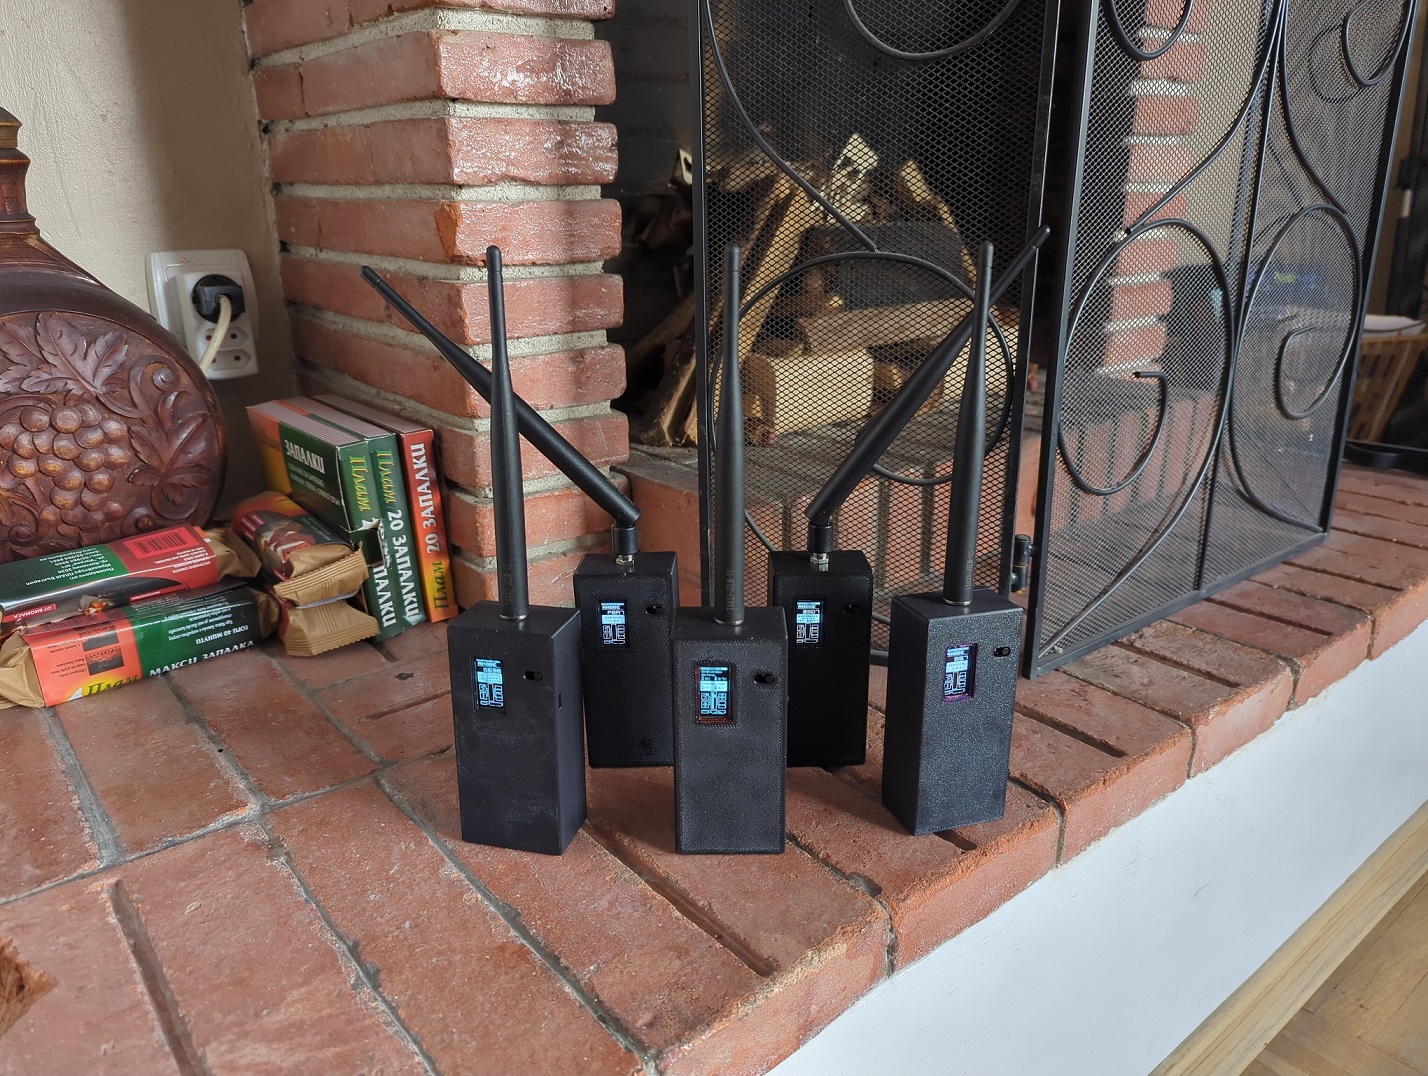
This is really, really awesome work!! Those finished kits look clean. Big fan. In for updates

aetherlab 509723a0ccb60610...
edited #16

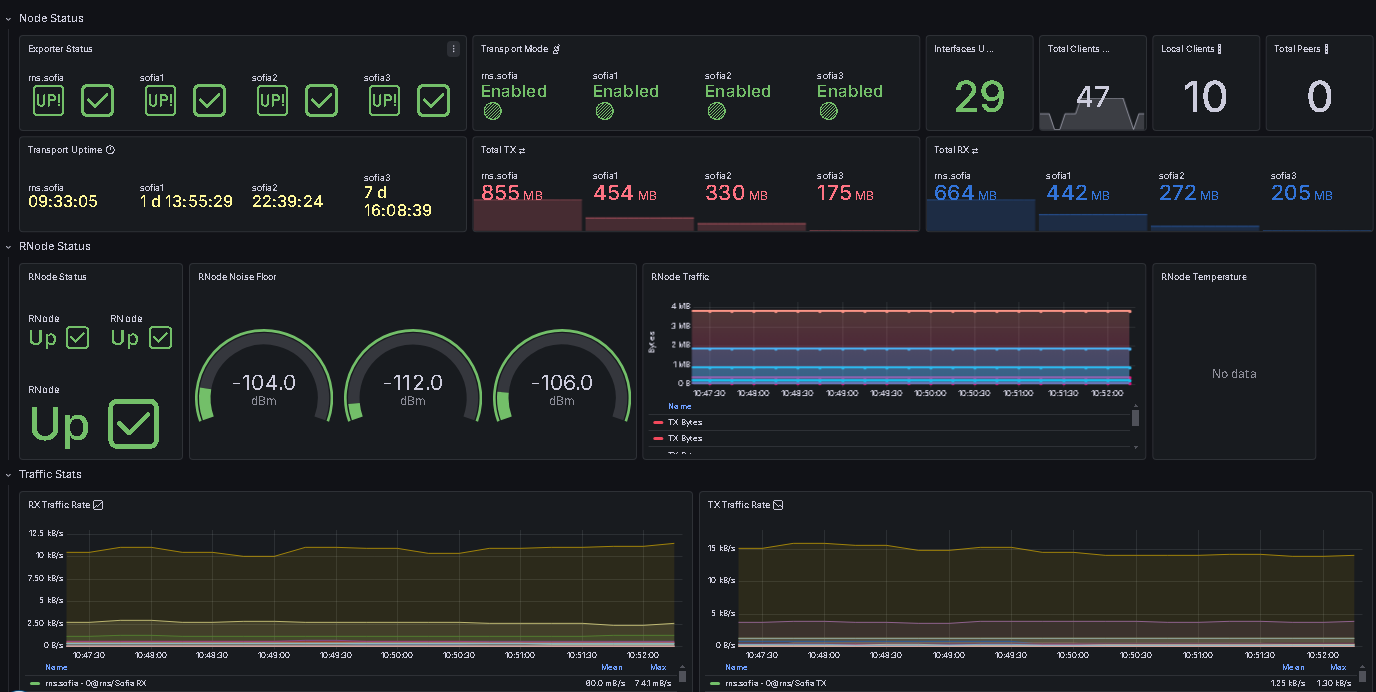
Well, my very generous node host went off to vacation actively and did not bother to send pictures to me, of course. But anyway, rns.sofia LoRa group is now all ESP32 S3 based, got the old WR00M boards out, as I admit they have a worse noisefloor values, and the boomerang leads back to me doing a dumb mistake. I have updated the design files (Gerber's), but if anyone has built an aethermobi WR00M and has issues, please get in touch, I will help clear them out. NOTE:The S3 board is OK.
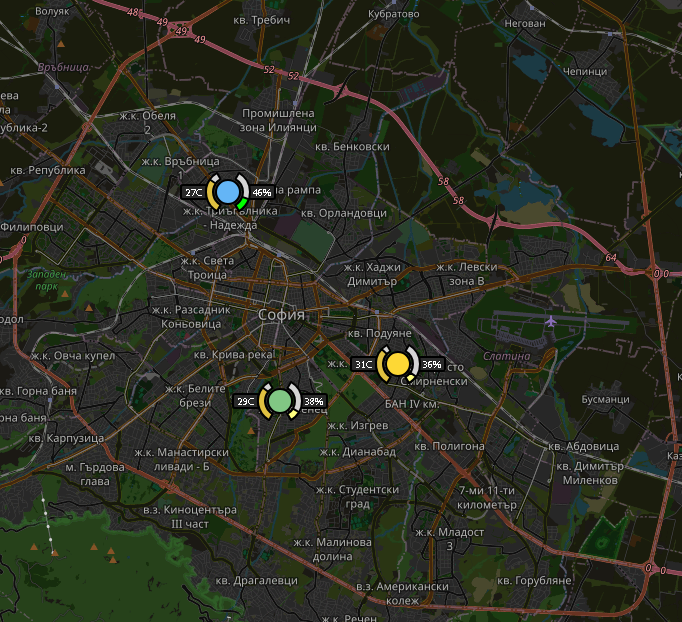
The network now looks a bit like this:
image.png

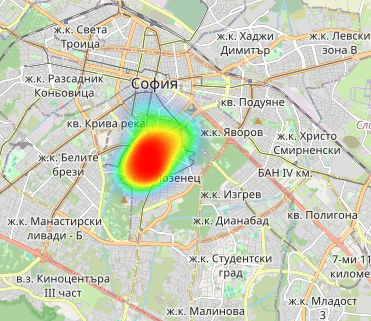
The 3 nodes are placed in Sofia like this:
image.png

I took some time off working on HW, but I will start building the next set of nodes for deployment soon. I also did some preliminary wardriving and started to map node coverage for Sofia 1, and realized i need to do a lot more walking to get it well mapped... :D
I use Nickie's great wardriving suite - map, app on Graphene OS and wardrive bots on all node's OrangePI's. https://git.rns.moscow/deuxyeux/rns-wardrive-tools
image.png


aetherlab 509723a0ccb60610...
edited #17

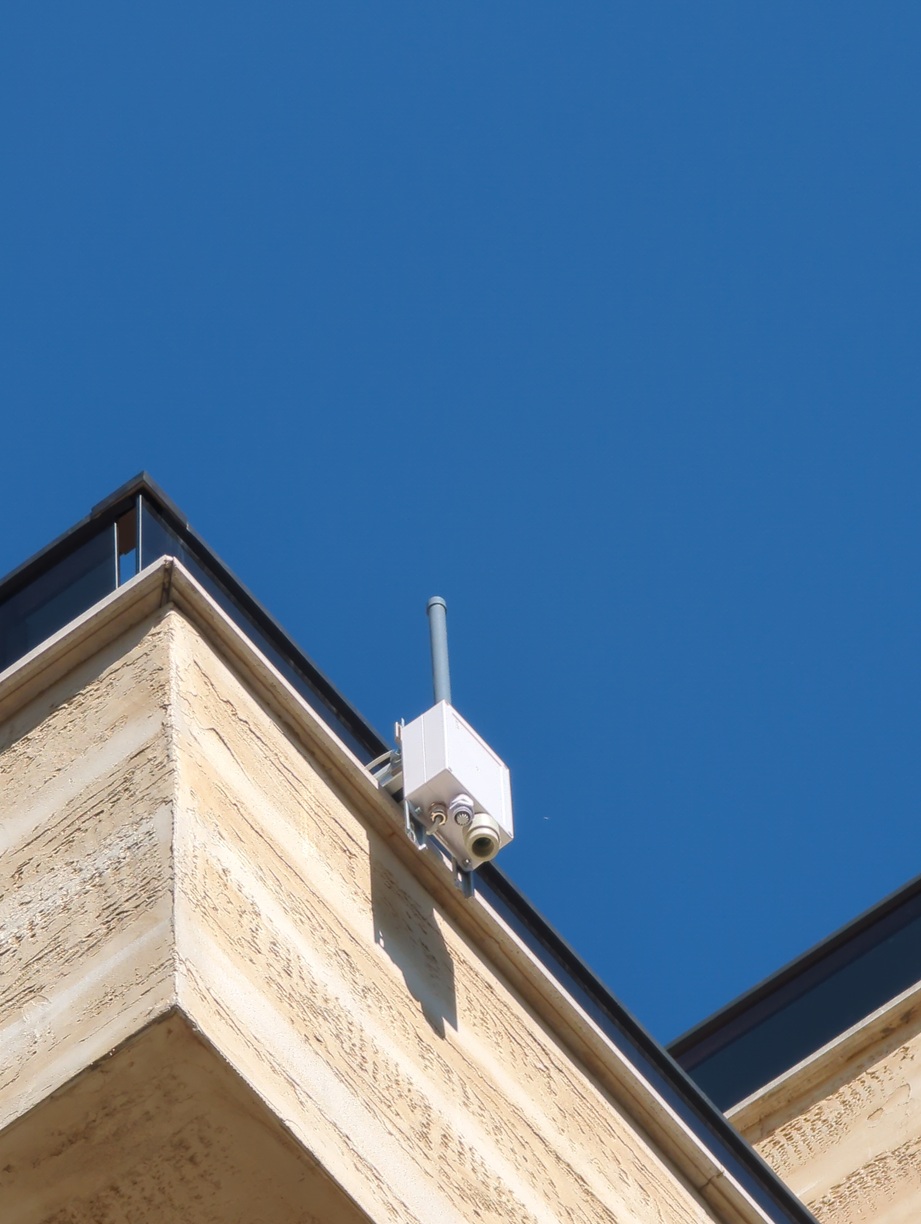
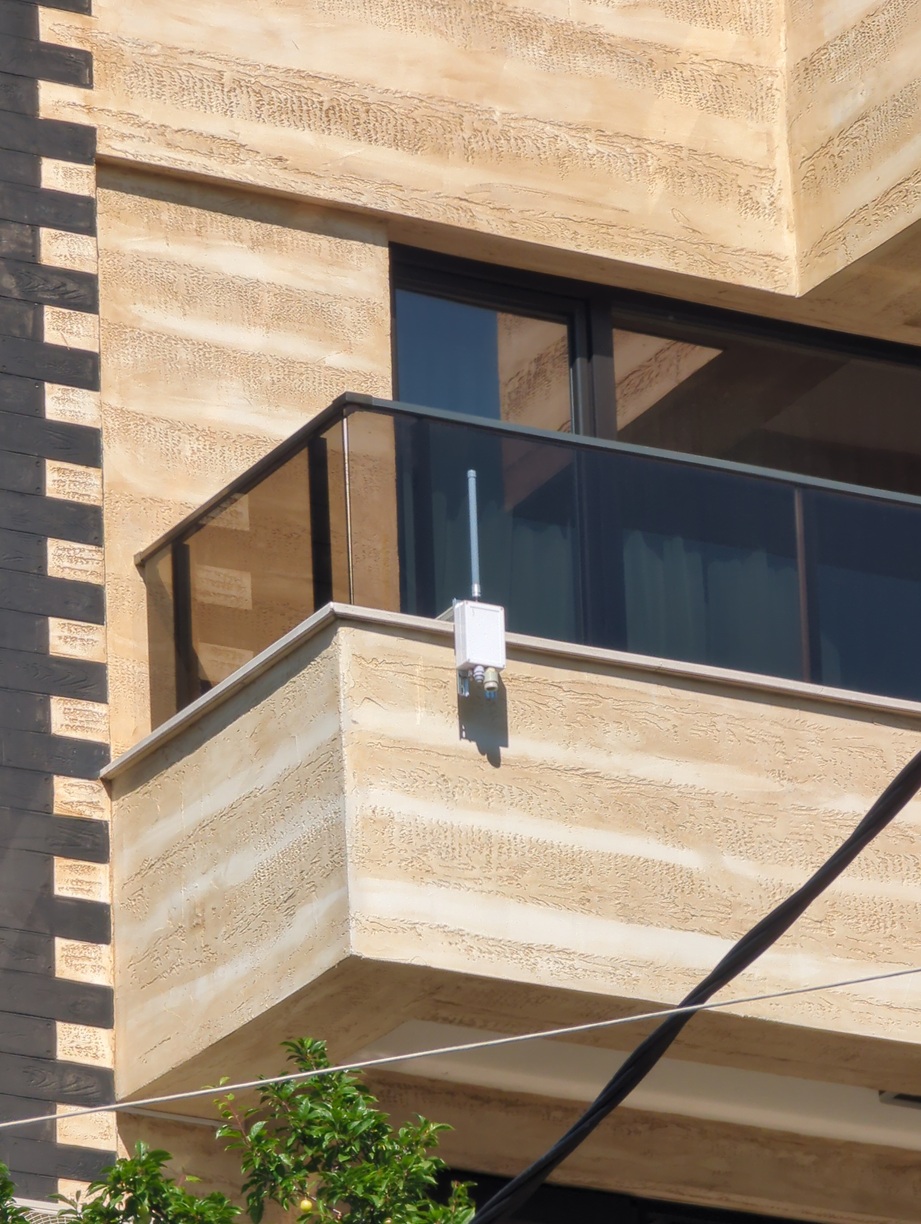
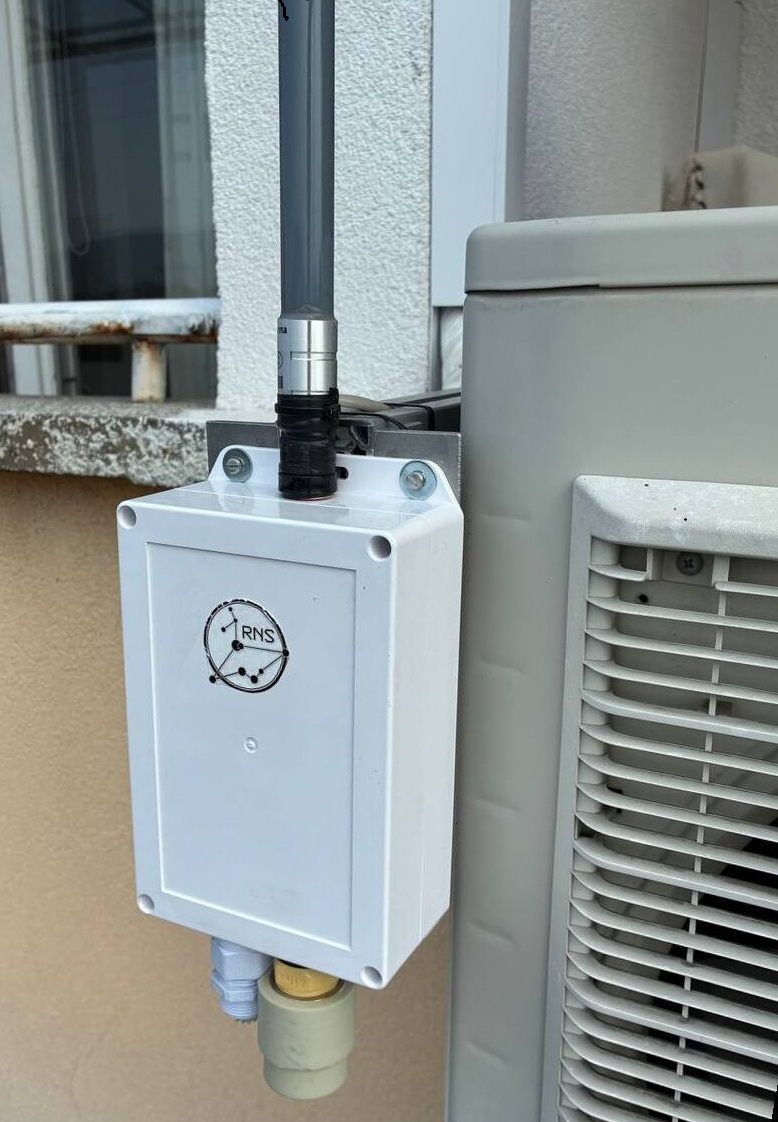
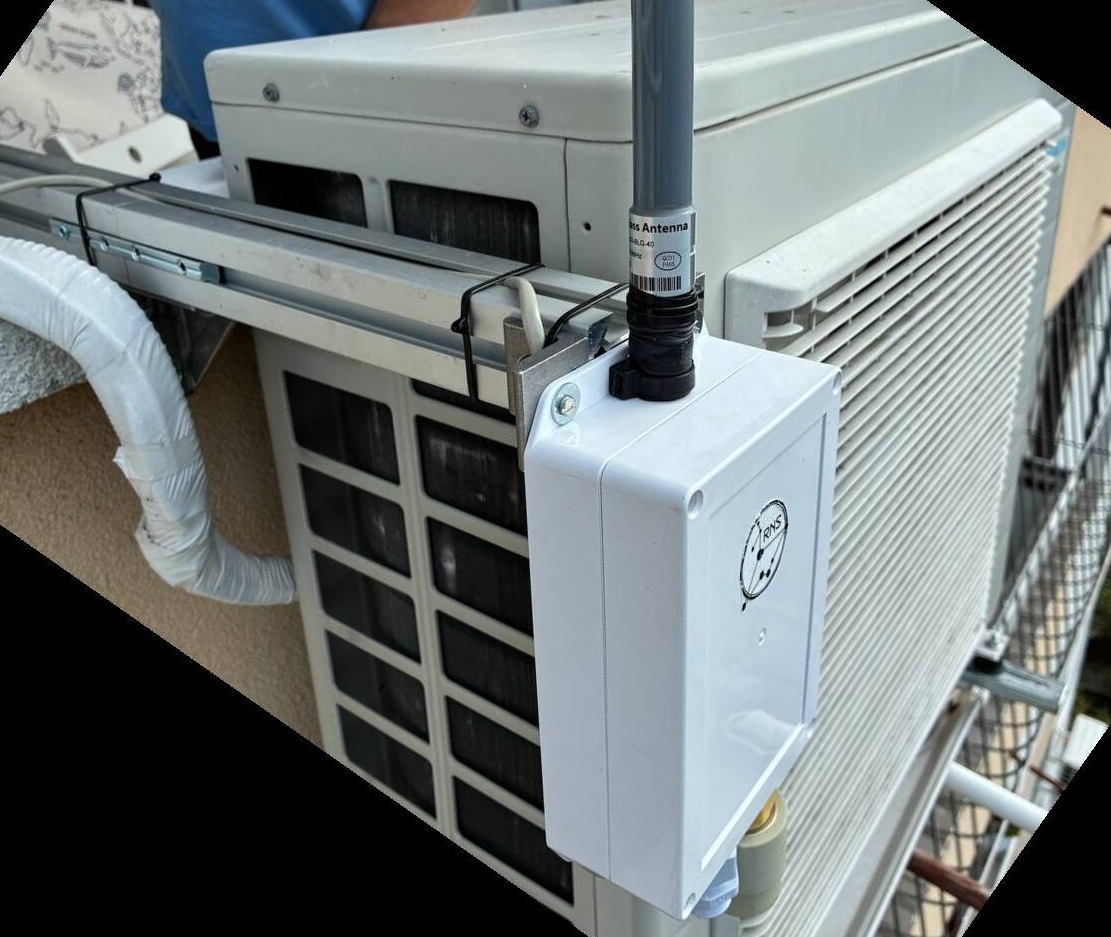
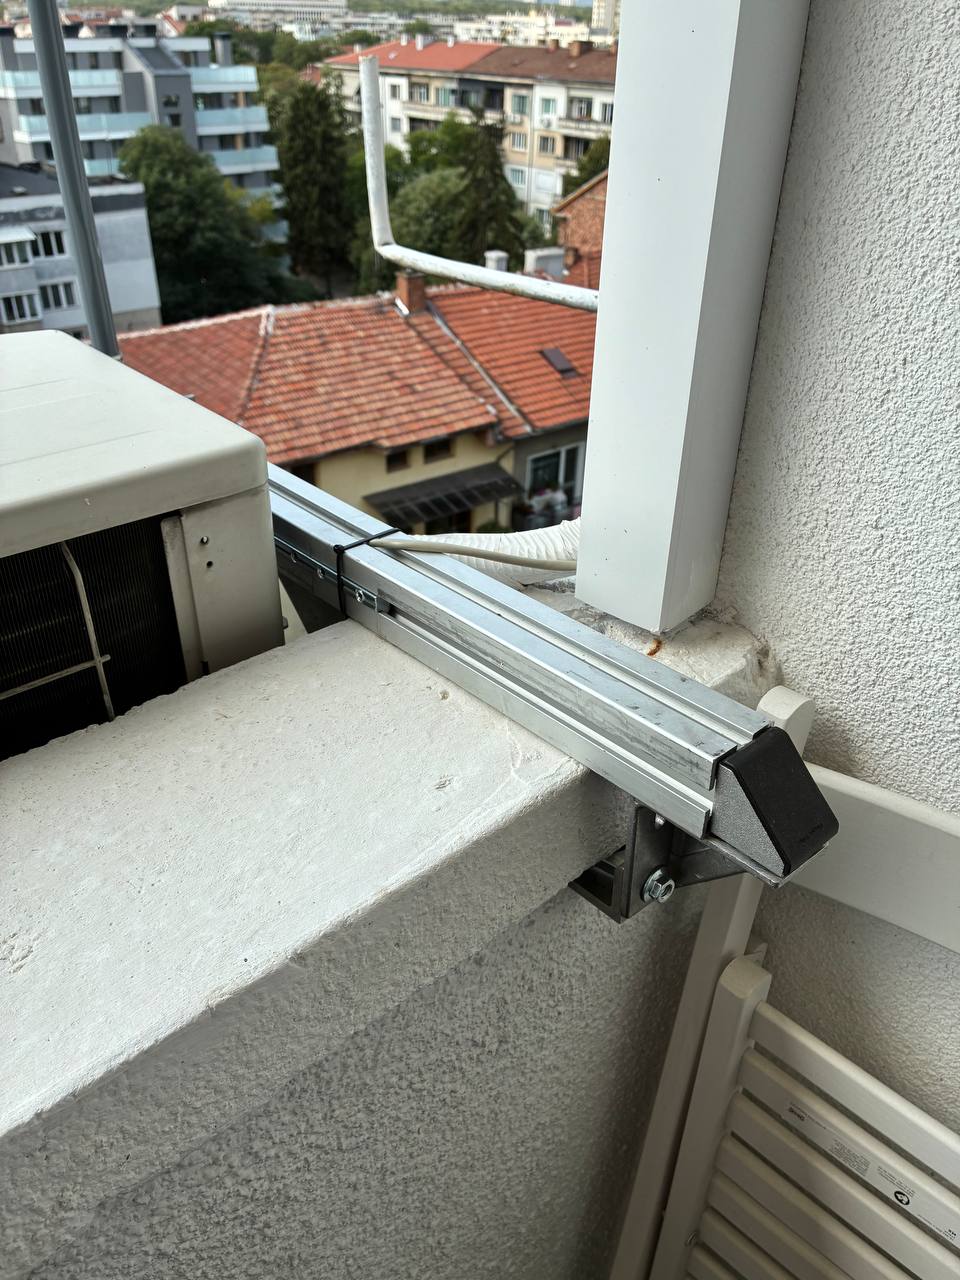
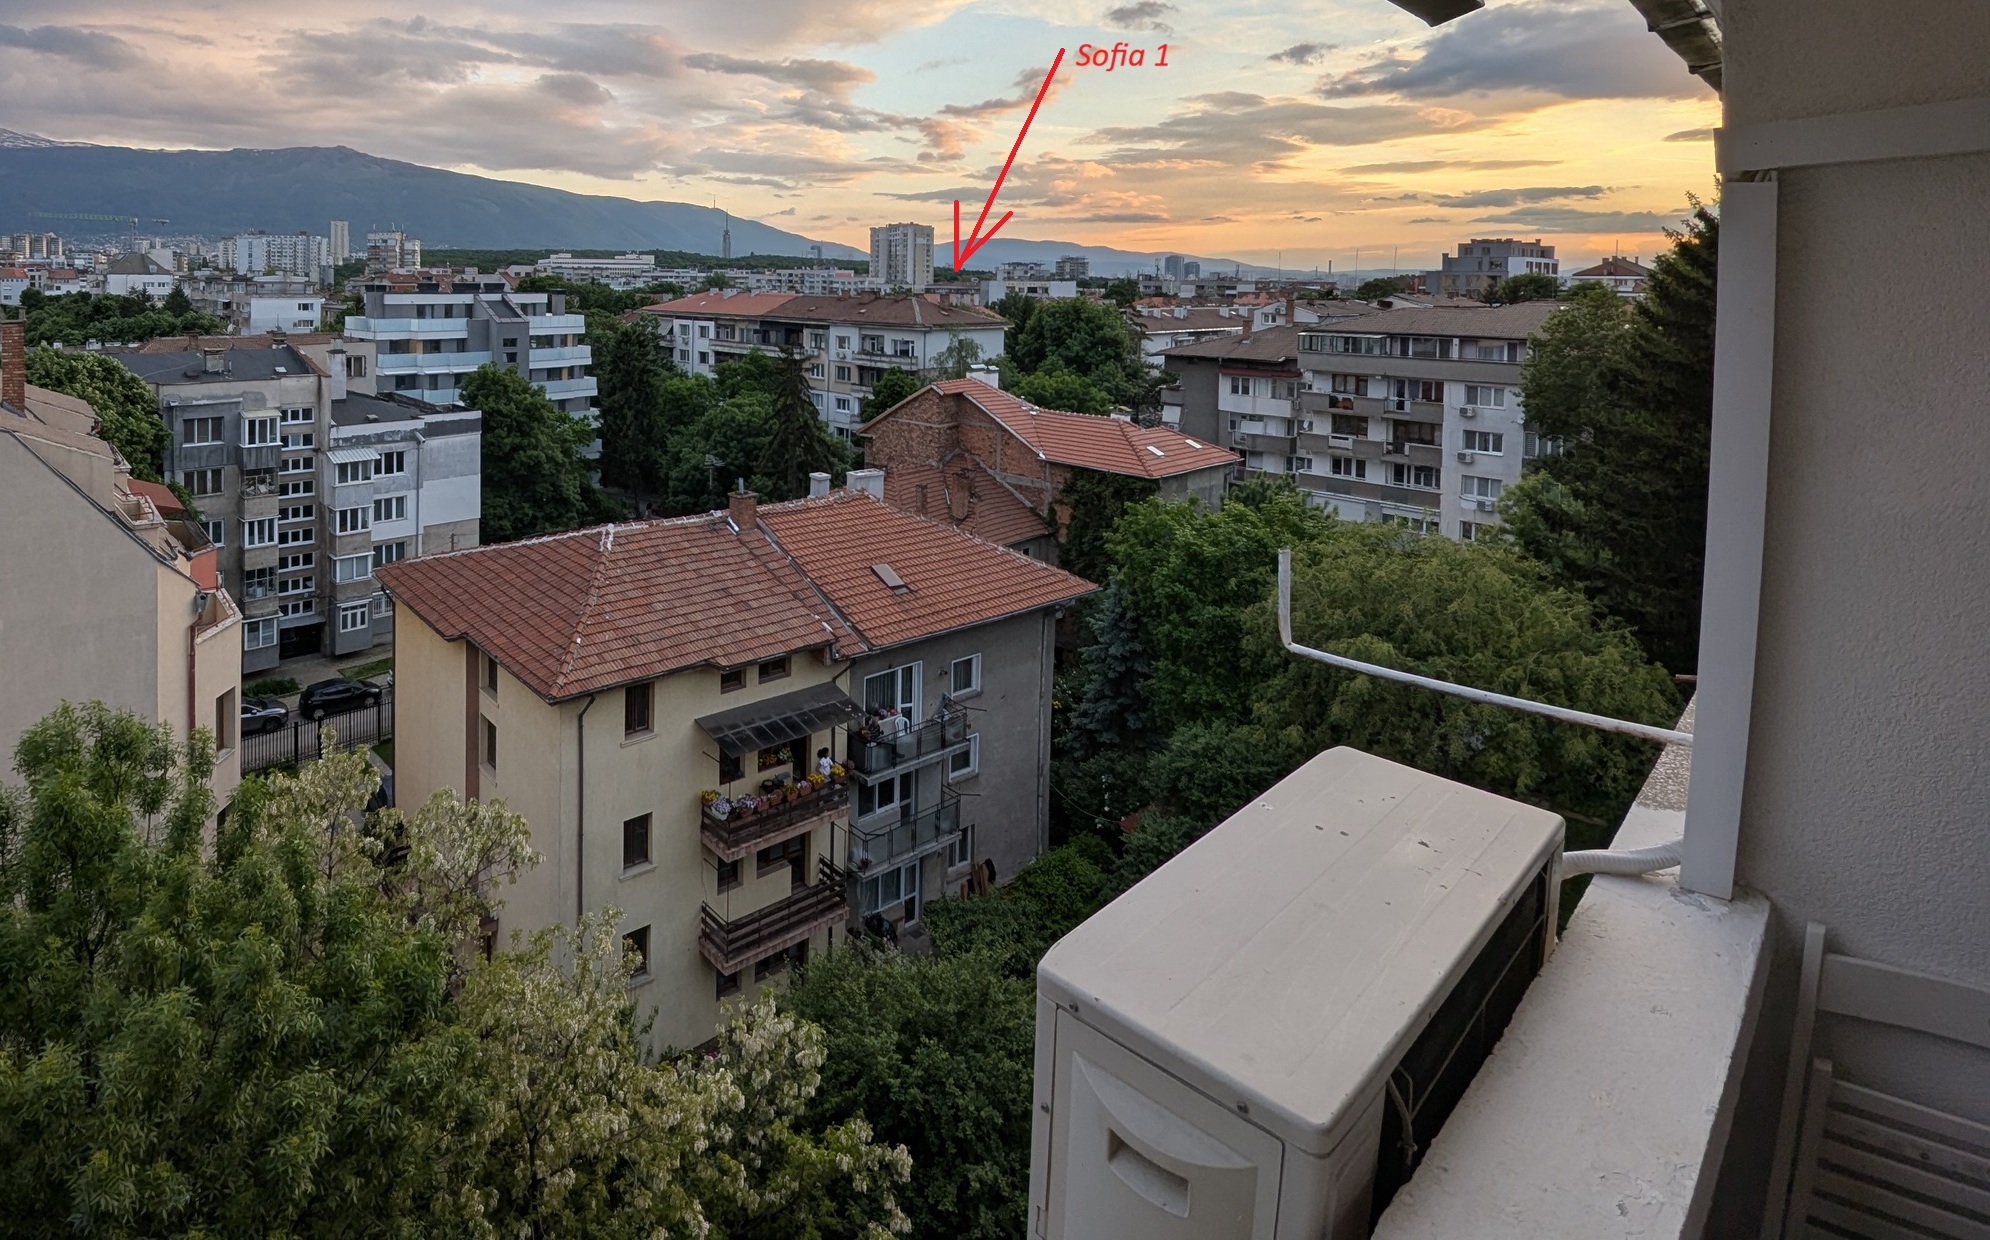
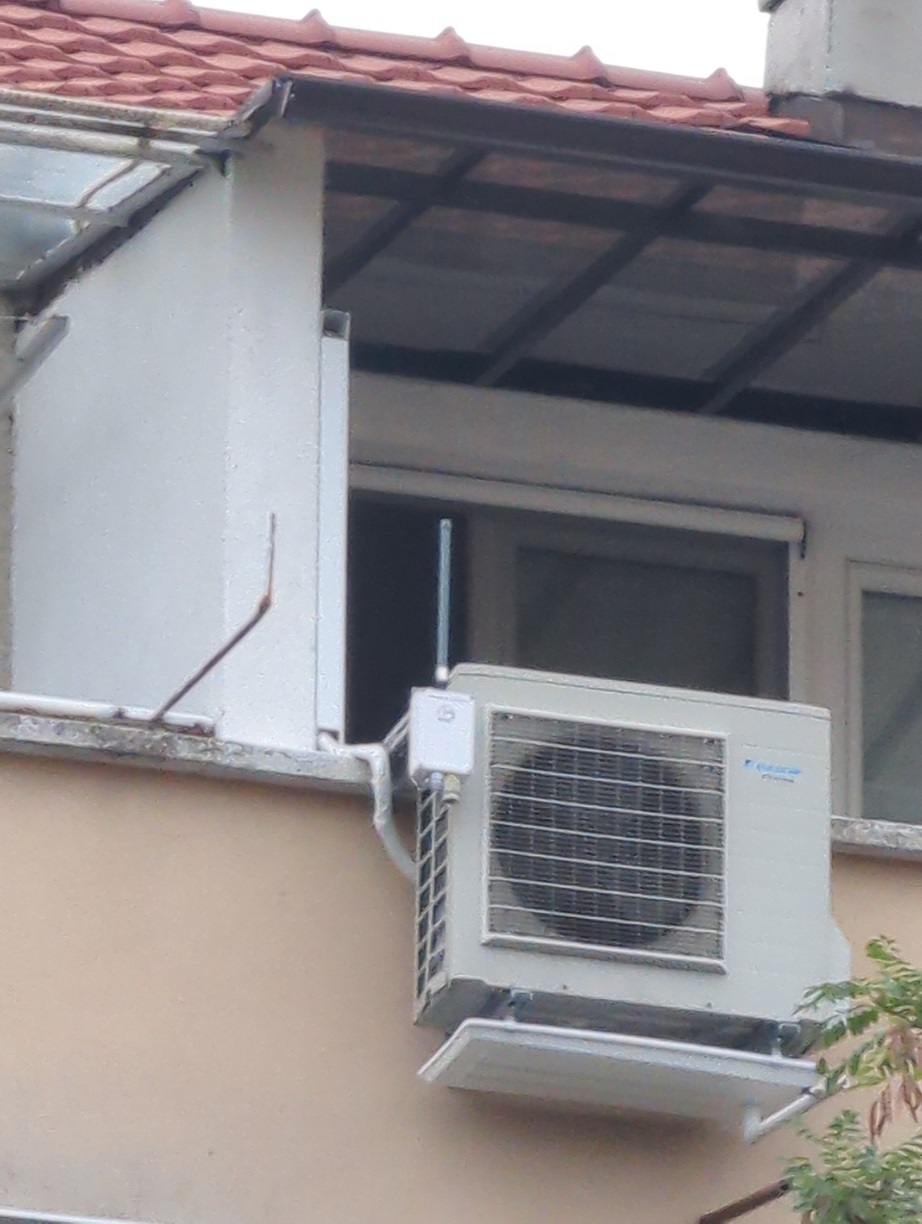
Finally SOME pictures from Sofia3! Sorry for the wild crop! We had very little space to maneuver in and it's far from optimal near the AC, but it is what it is. AC is used in summer only anyway and will not freeze over the mount.
I had to build a clamp from Rexroth profiles to grab the profile of the wall, worked just fine. Lesson learned: Don't do this shit when it's dark...:D

photo_2026-09-01_11-47-14.jpg
photo_2026-09-01_11-47-17.jpg
photo_2026-09-01_11-47-22.jpg

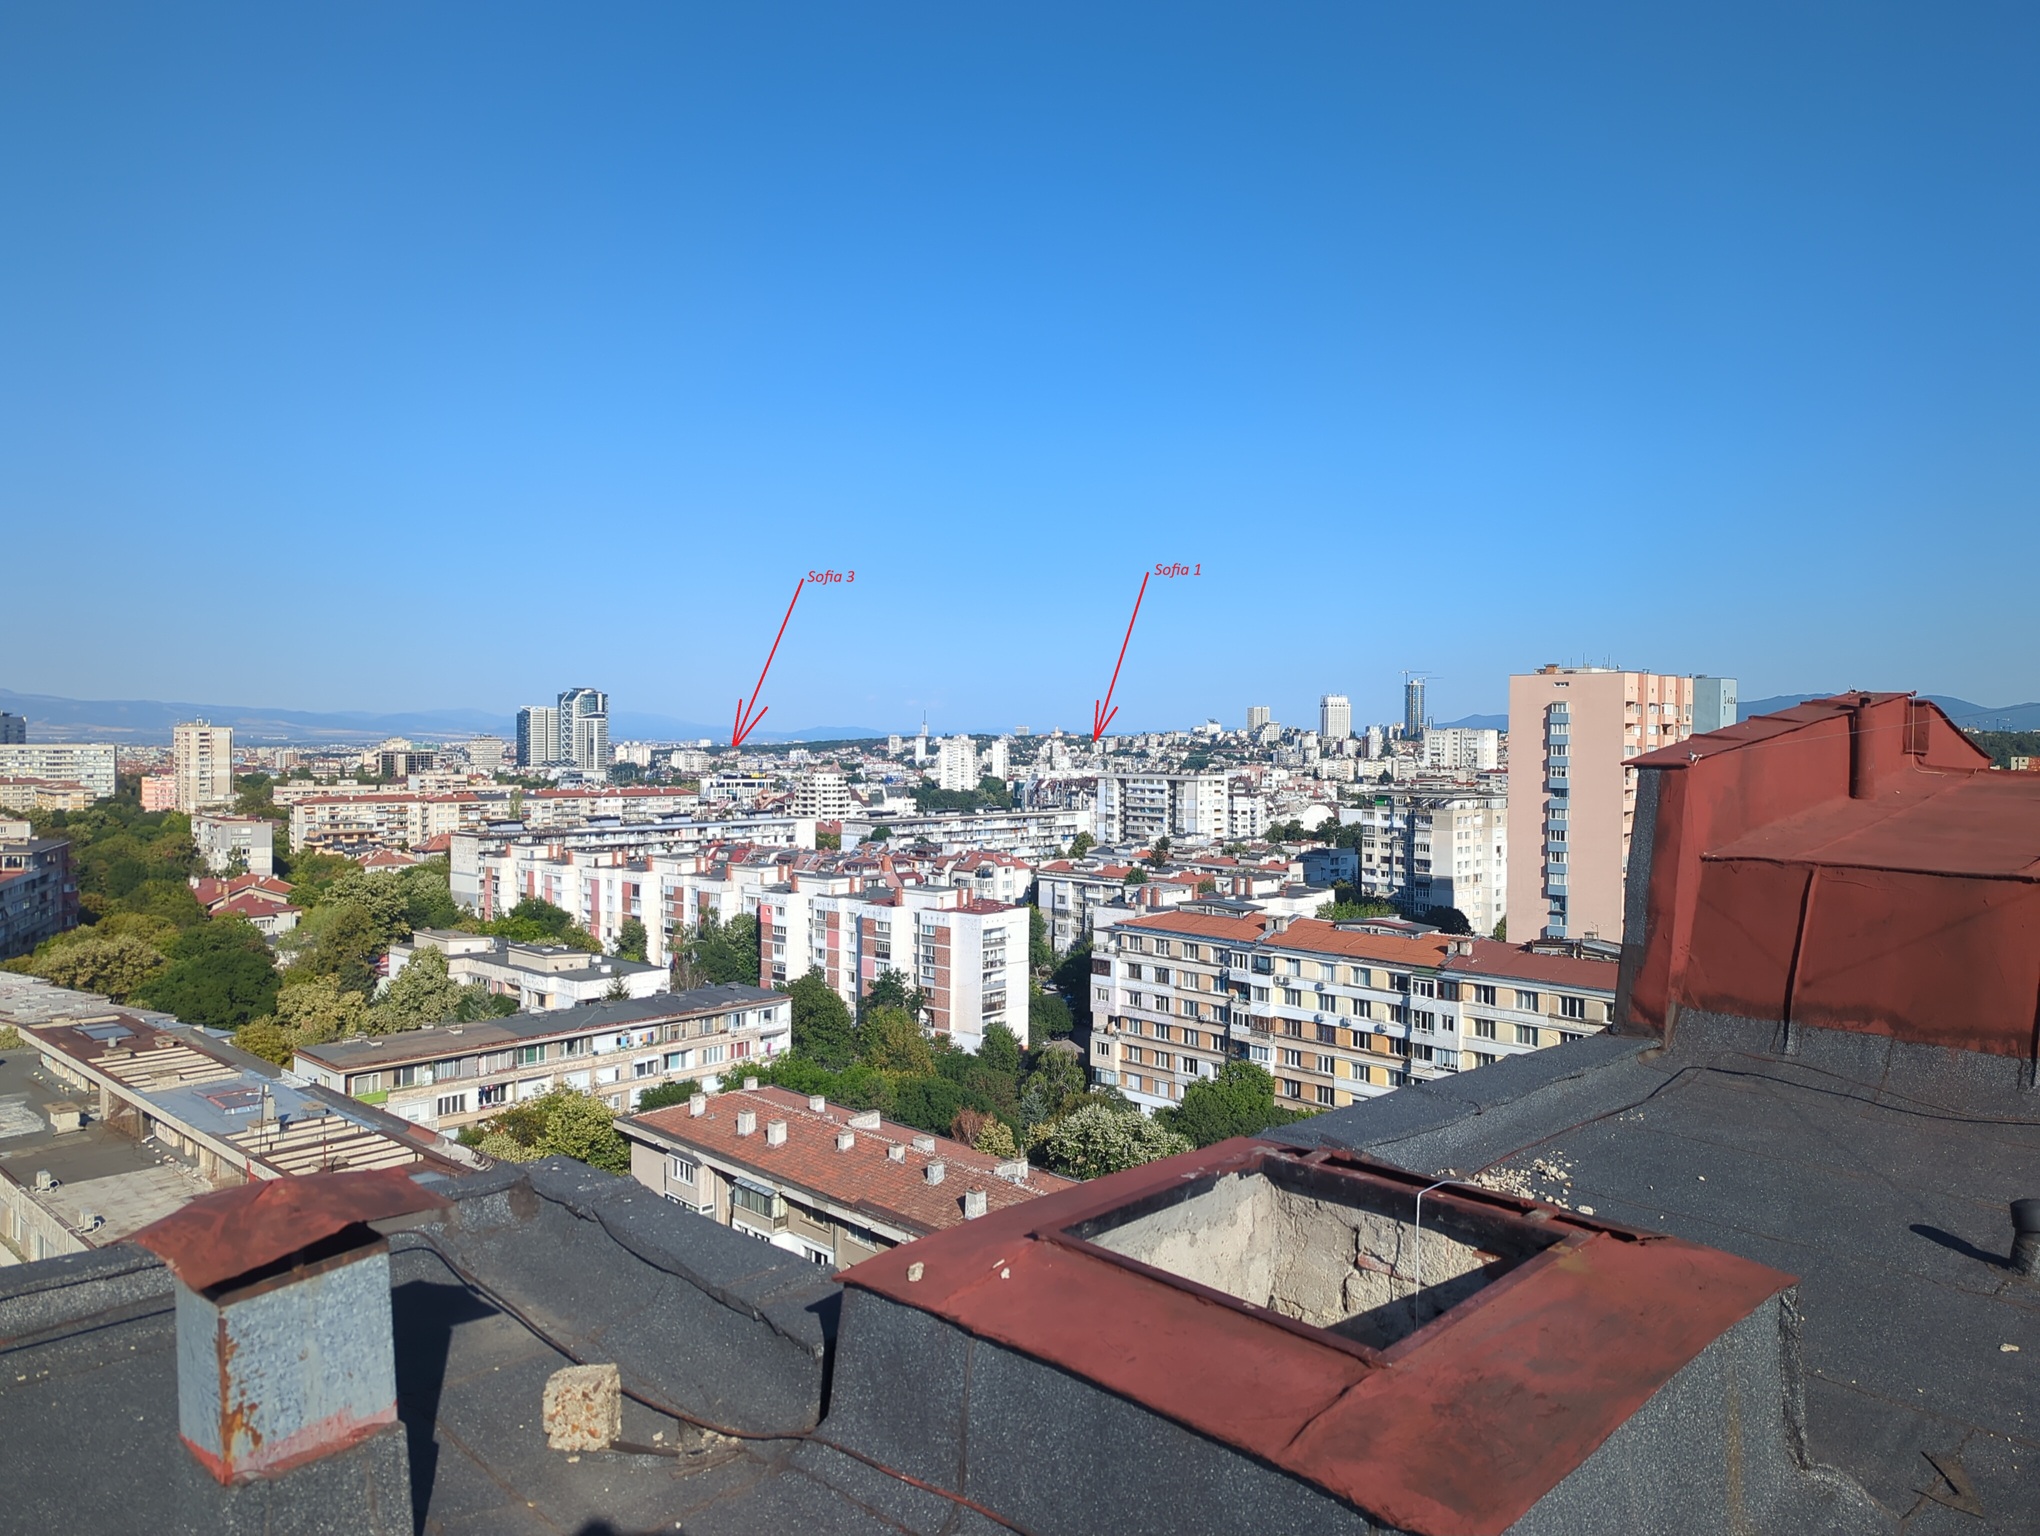
This node has almost pure LOS to Sofia1 at around 3600m and a stable link at around -70dBm RSSI, they have meshed. View from Sofia3 towards Sofia1, tree line just hides pure LOS, but actually its fine. Picture is before mounting.

IMG_20260521_203031_075.jpg
IMG_20260915_173335_645.jpg

For dessert a small teaser from Sofia4 future location! ;) It will stand around 2 meters above this level on a metal pole on the right, mounted very sturdily to the red elevator room extensions. Lightning rods are like 4-5 meters above and separated by at least 3m from our mount. Great place, once home to a heavy SatTV aerial.
IMG_20260817_174513_643.jpg

Anonymous
#18

Thank you for sharing those! It motivates me to build more nodes myself and its very interesting to see how it is done if someone knows what they are doing.

RNS_BOB 3b674c4f41e1812a...
edited #19

Thank you @aetherlab so much for posting your setup. I have been following and am about to start my deployment. I wanted to ask if you had https://git.rns.moscow/deuxyeux/rns-wardrive-tools working for both upload and download. I have set it up with sideband on my phone and shared the RPC the Wardriveing app states that everything works but the map that is generated only has the uplink data no downlink and no signal strength. I will try an pull logs but wanted to check with you first.

aetherlab 509723a0ccb60610...
edited #20

Here we go!
IMG_20260912_120812_101.jpg
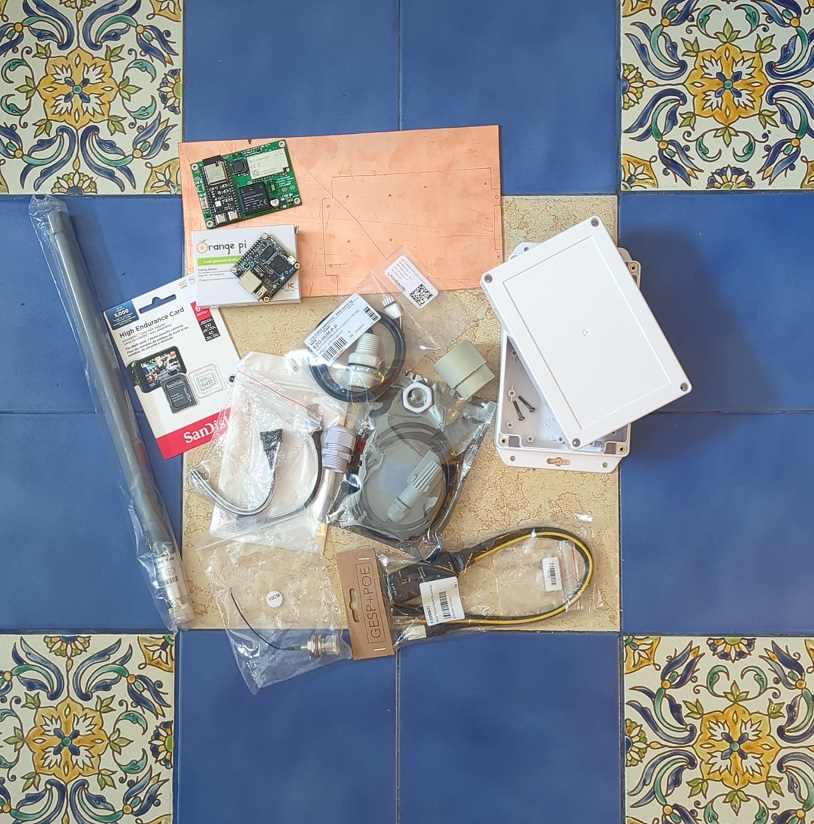
Lets build Sofia 4! I will try not to go into too many details, just specific things, I have dealt with over the previous builds. I also made several mistakes, of course, which I wrestled on the go. We start with cutting the baseplate for the box. It is done by scouring/breaking, more than cutting. After this the plate is drilled and spacers mounted for both PCB's
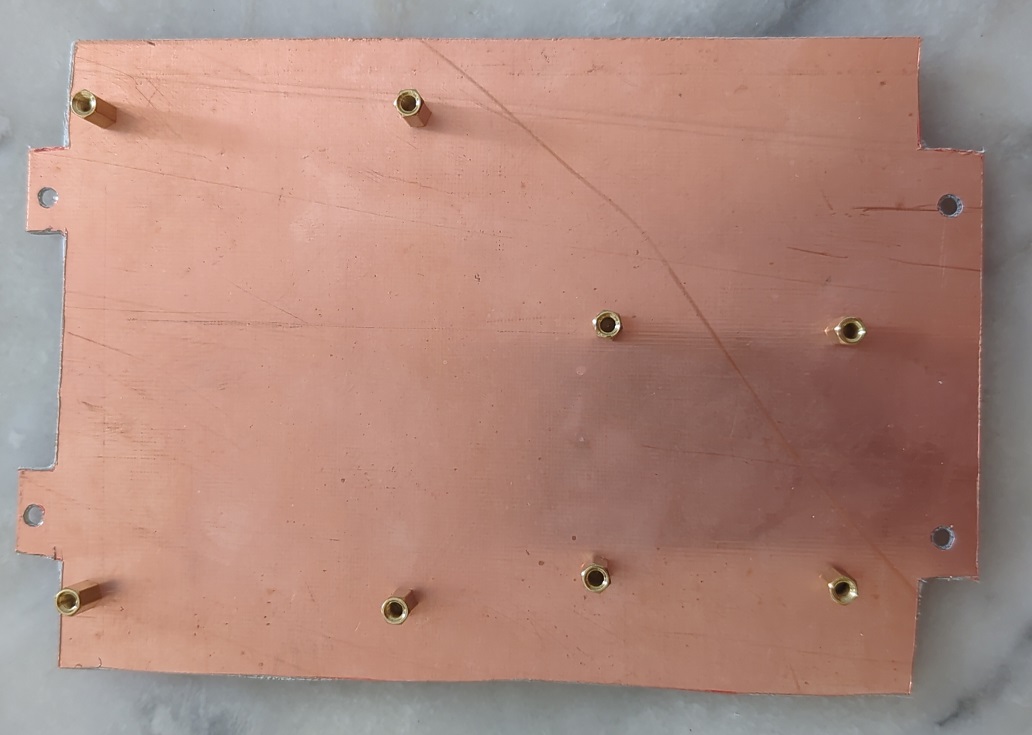
IMG_20260912_130503_217.jpg
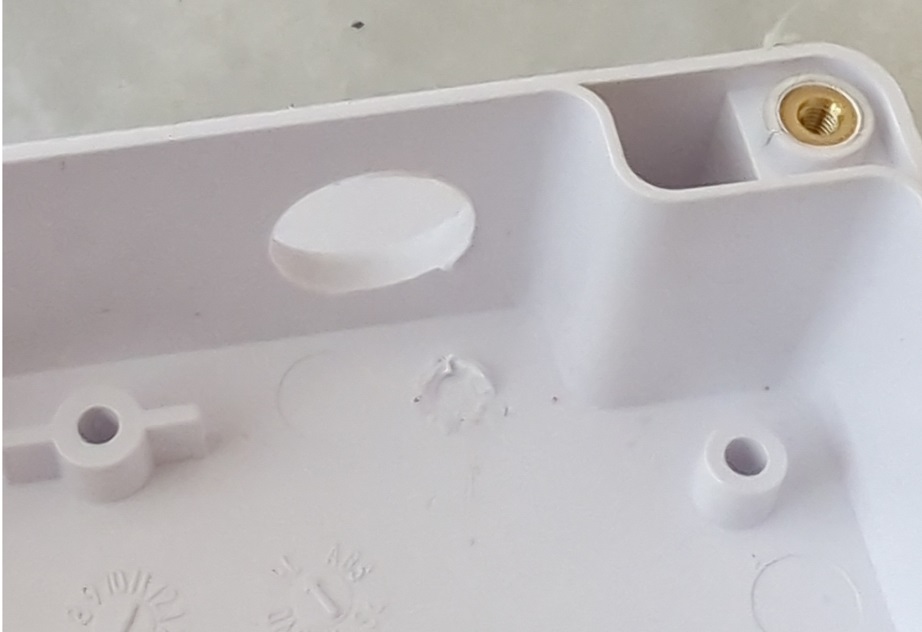
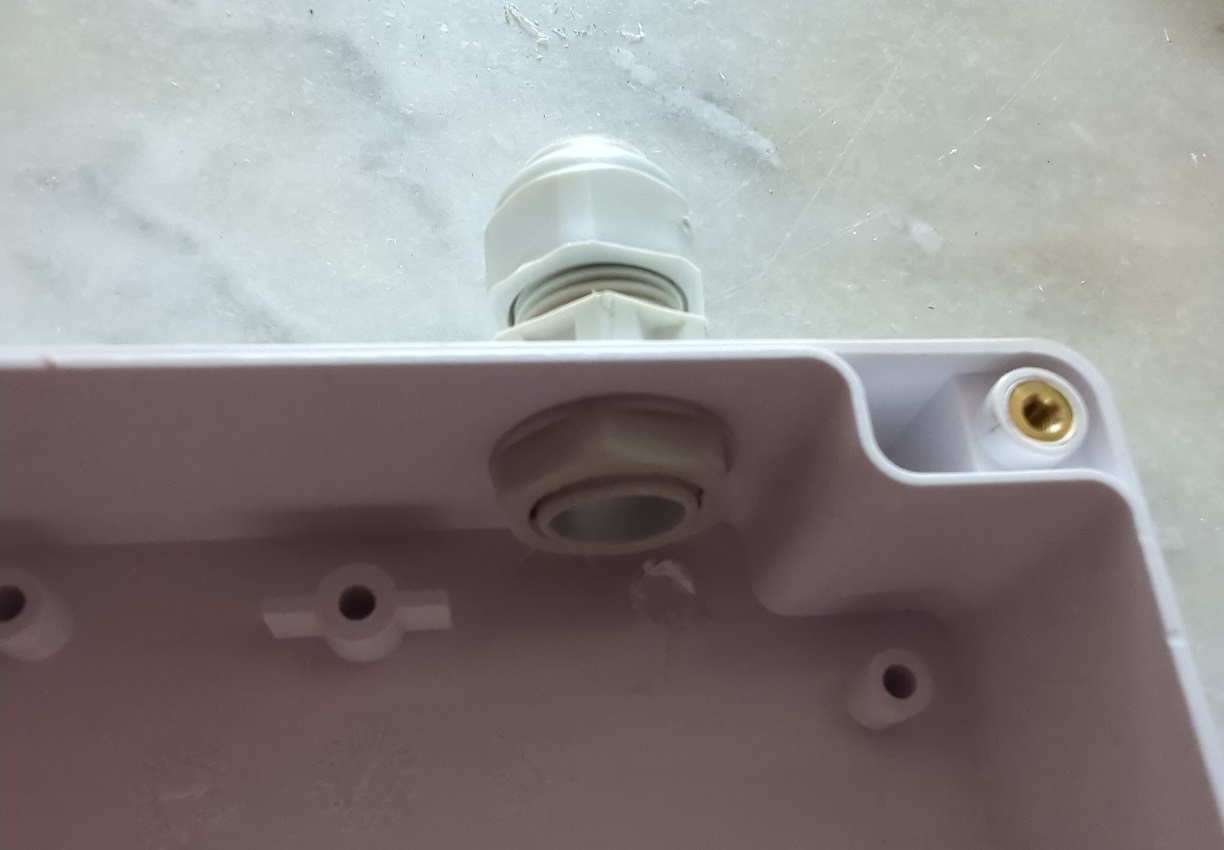
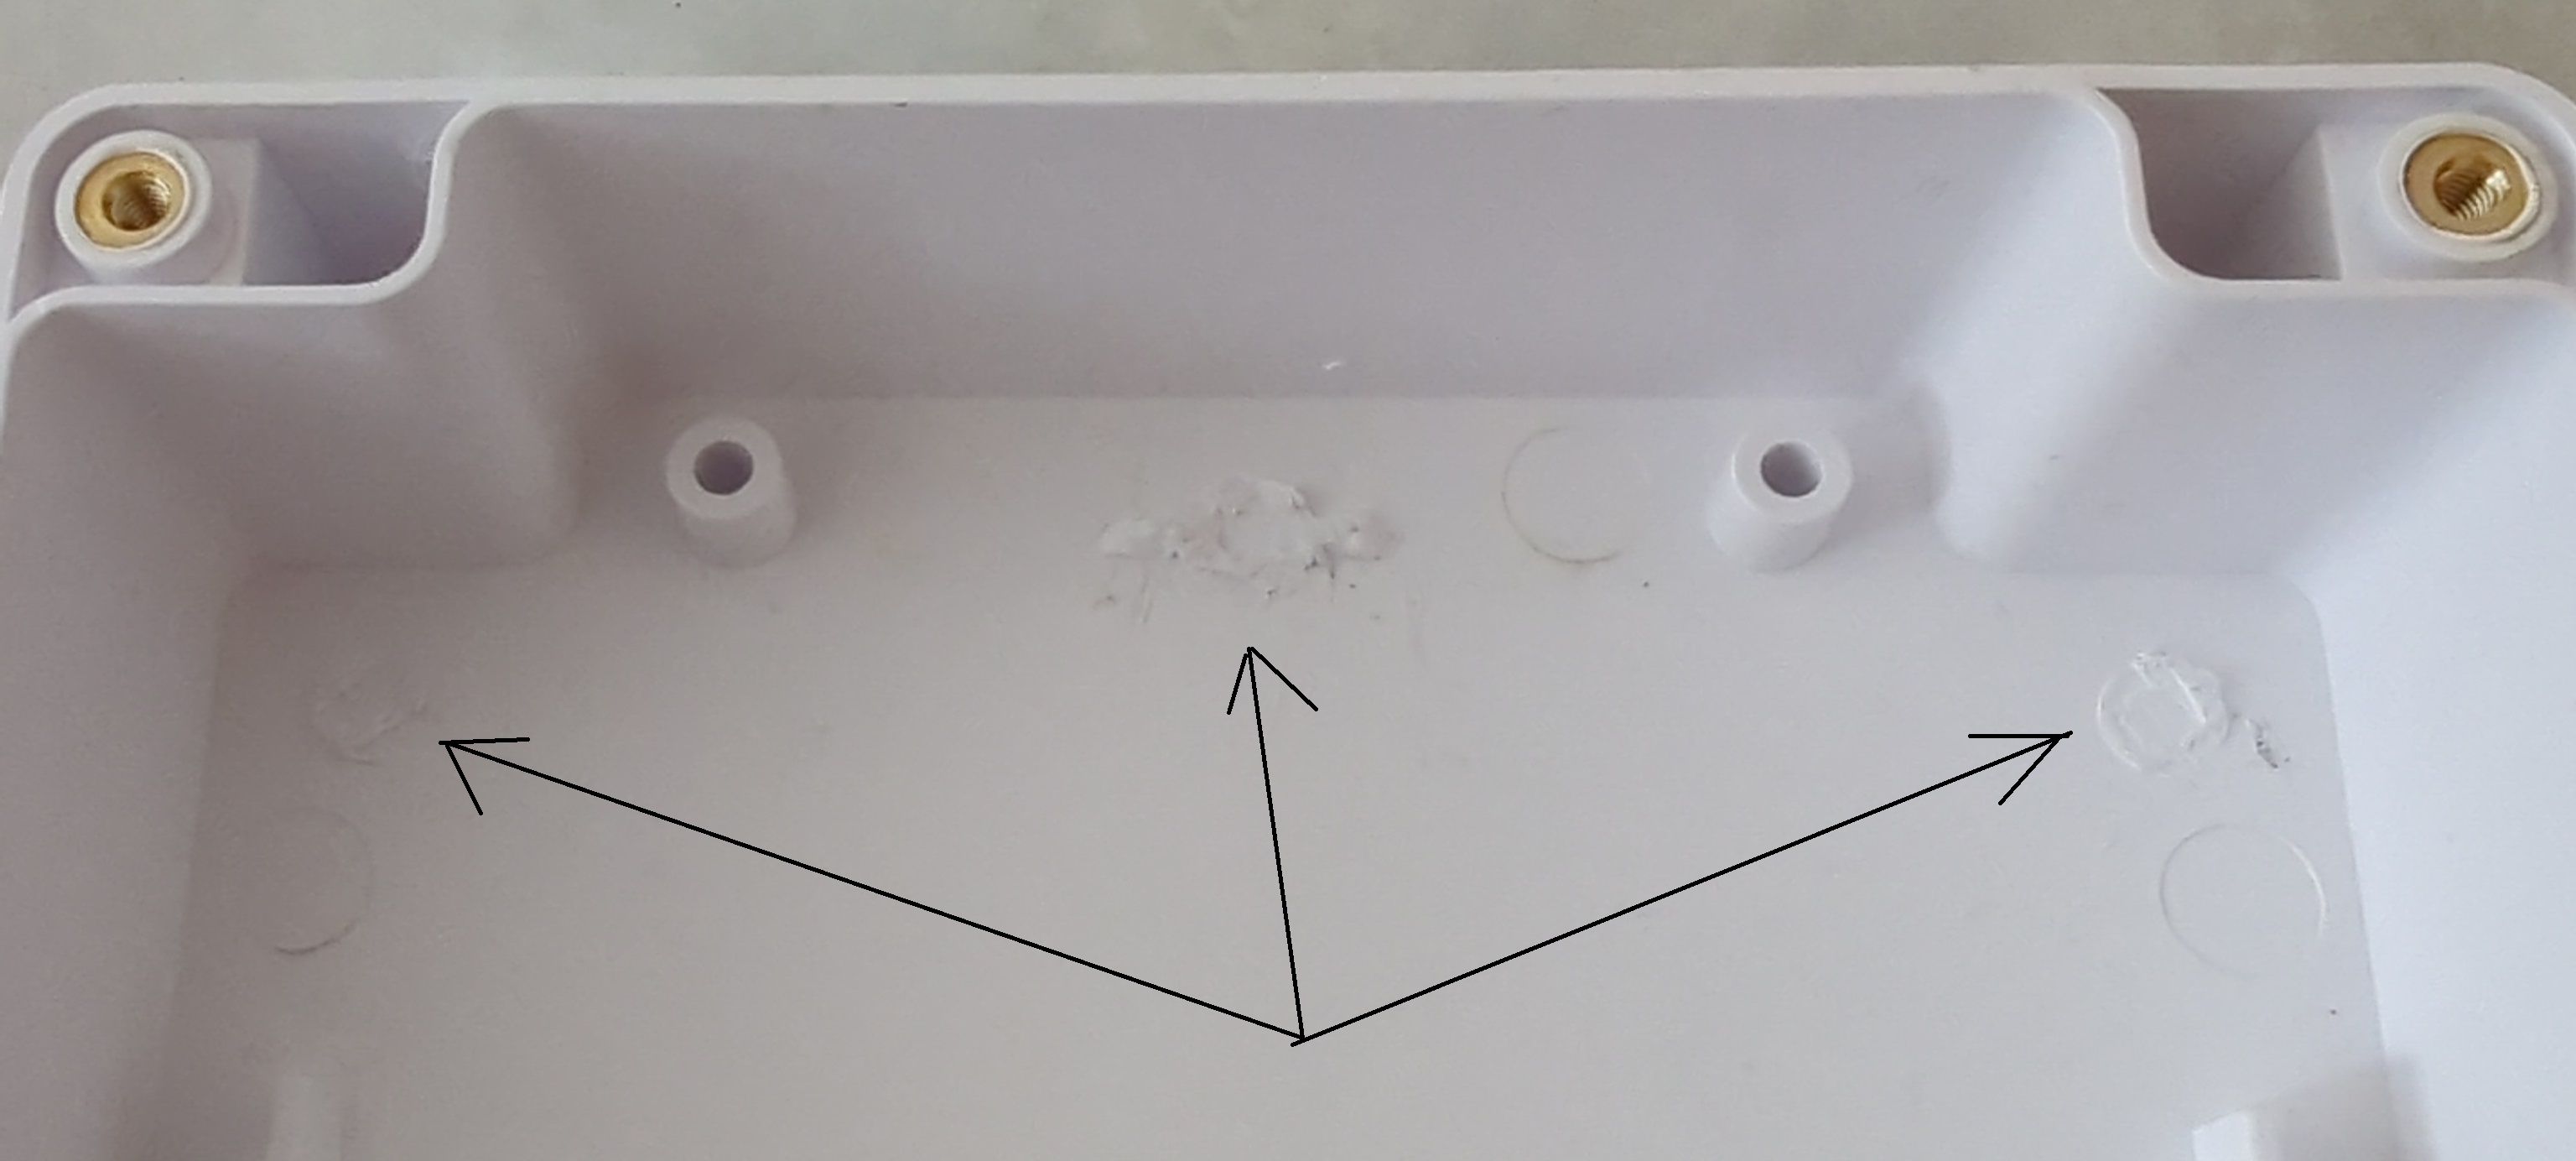
Than the box got shaved, loosing several studs and getting a hole for the cable gland for the LAN. Shit... drilled too low. Let's cut the baseboard to fit the nut. Mistake one.
IMG_20260912_130554_692.jpg
IMG_20260912_130534_672.jpg
IMG_20260912_132226.jpg
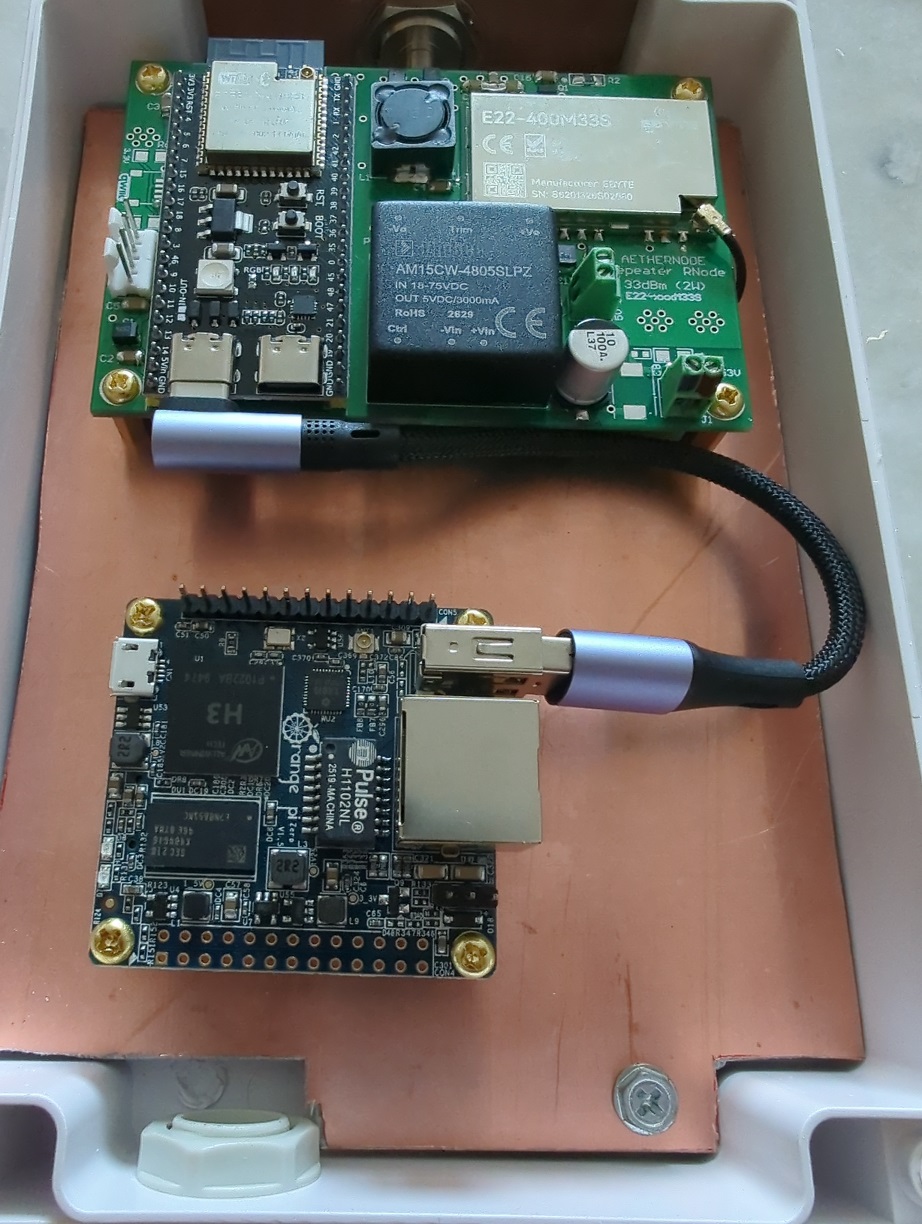
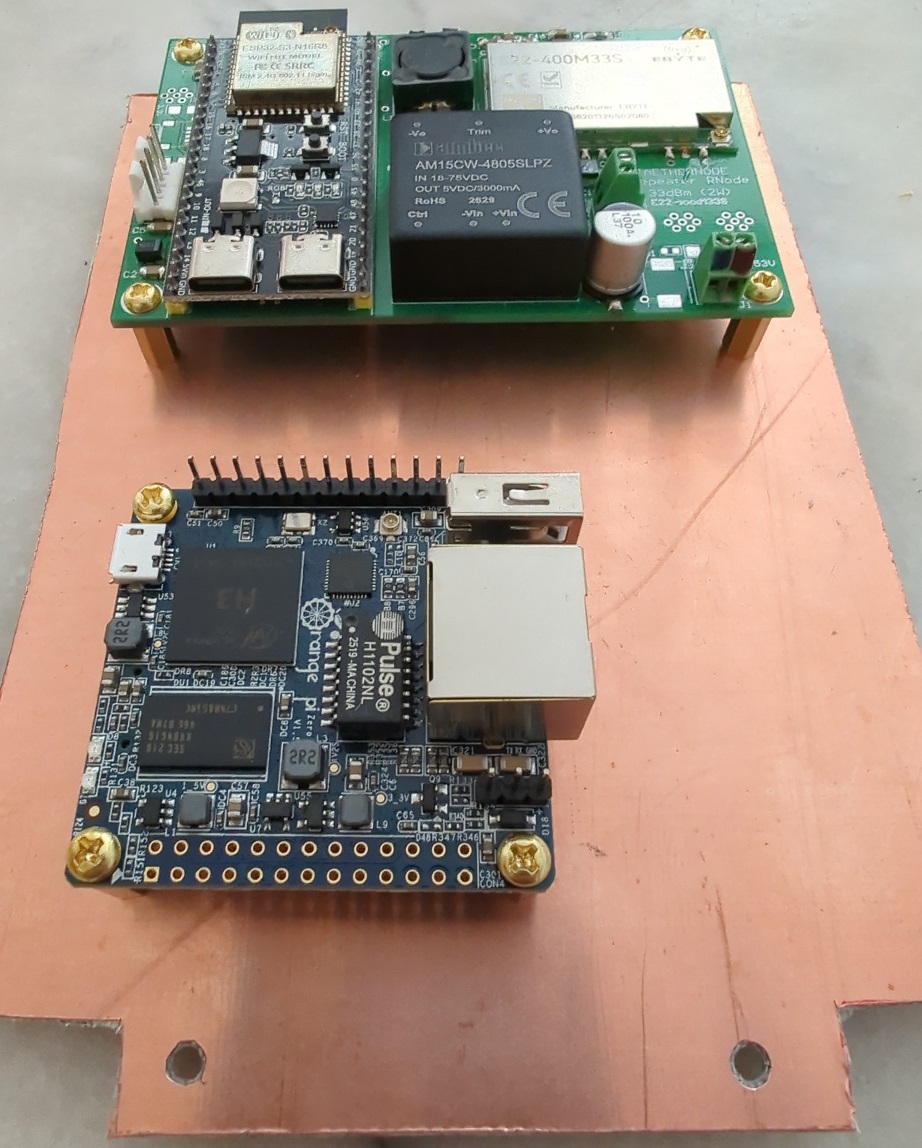
Next the PCB's got on for test fitting. The RNode was left on, the OrangePI Zero LTS would have to dismount the horse later for soldering jobs.
IMG_20260912_131538_847.jpg
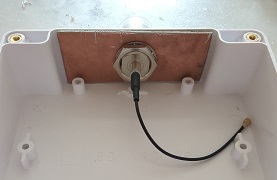
In the top side center I carefully drilled the hole for the panel-mount N to IPX trough. There is a fat 2mm PCB for strengthening the top wall, because Sofia 4 will be high in the winds and I am out of aluminium ones.
IMG_20260912_132109_148.jpg
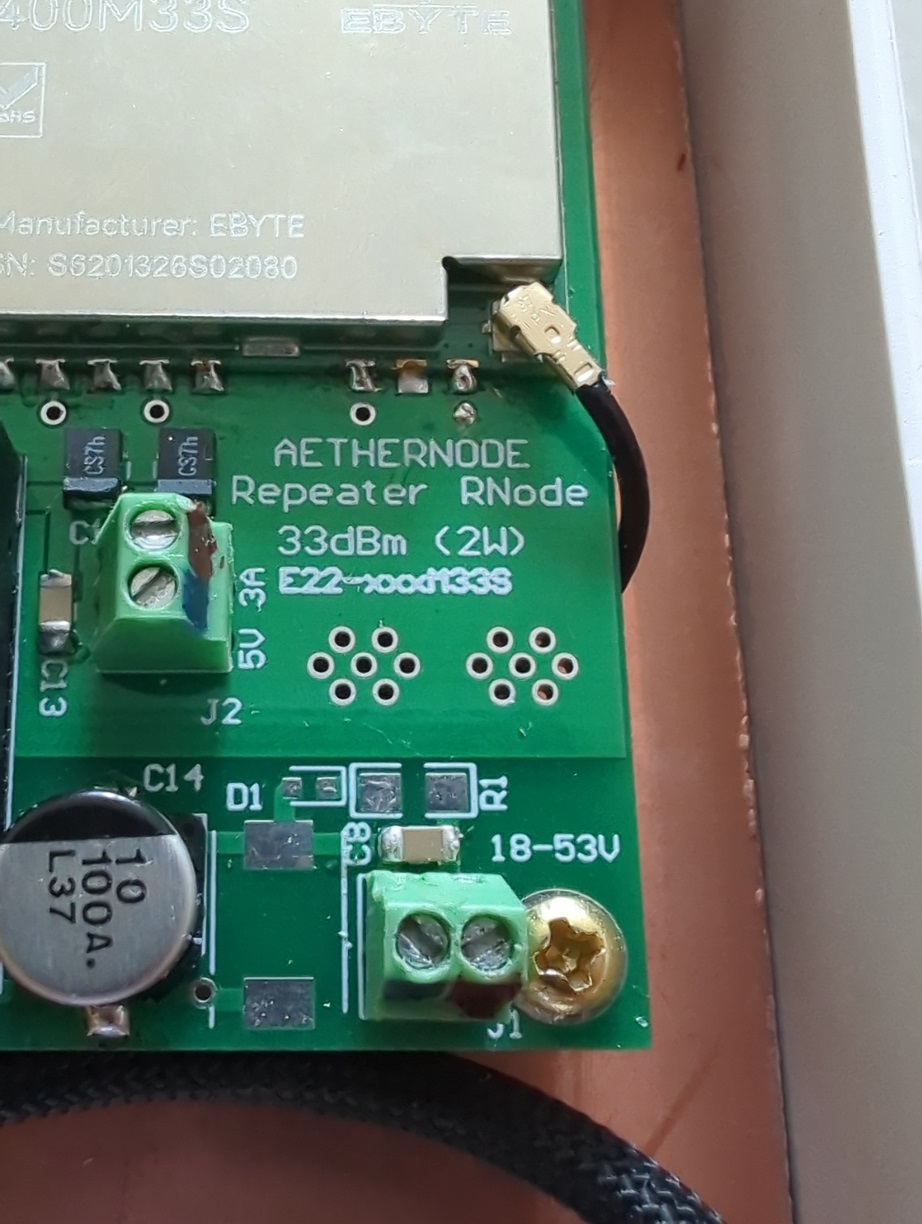
Carefully plugged in the IPX. Keep in mind to align those well, before applying any force, and to remember, that a virgin female IPX (cable side) is pretty tight and the spring needs more persuasion. But this is only once.
IMG_20260912_133635_531.jpg
IMG_20260912_133616_428.jpg
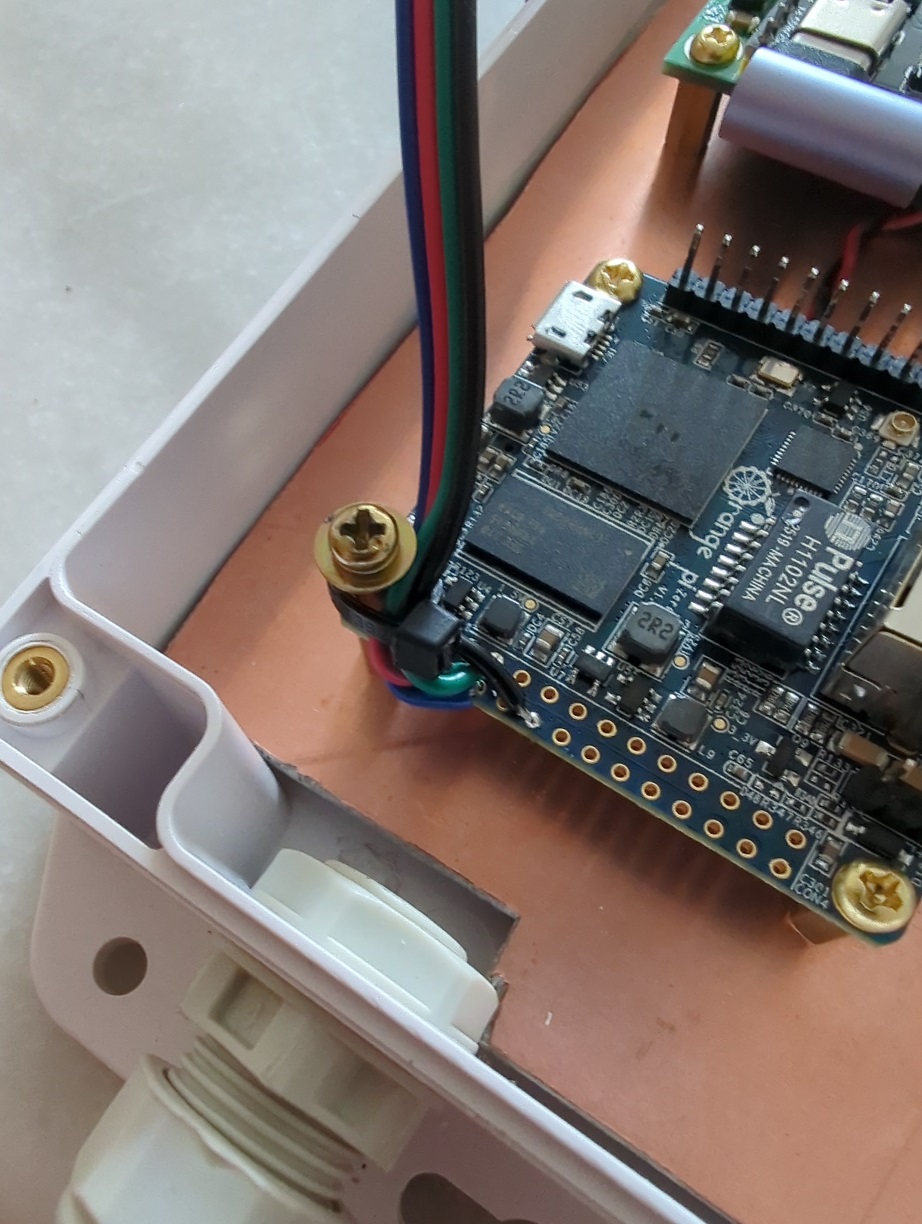
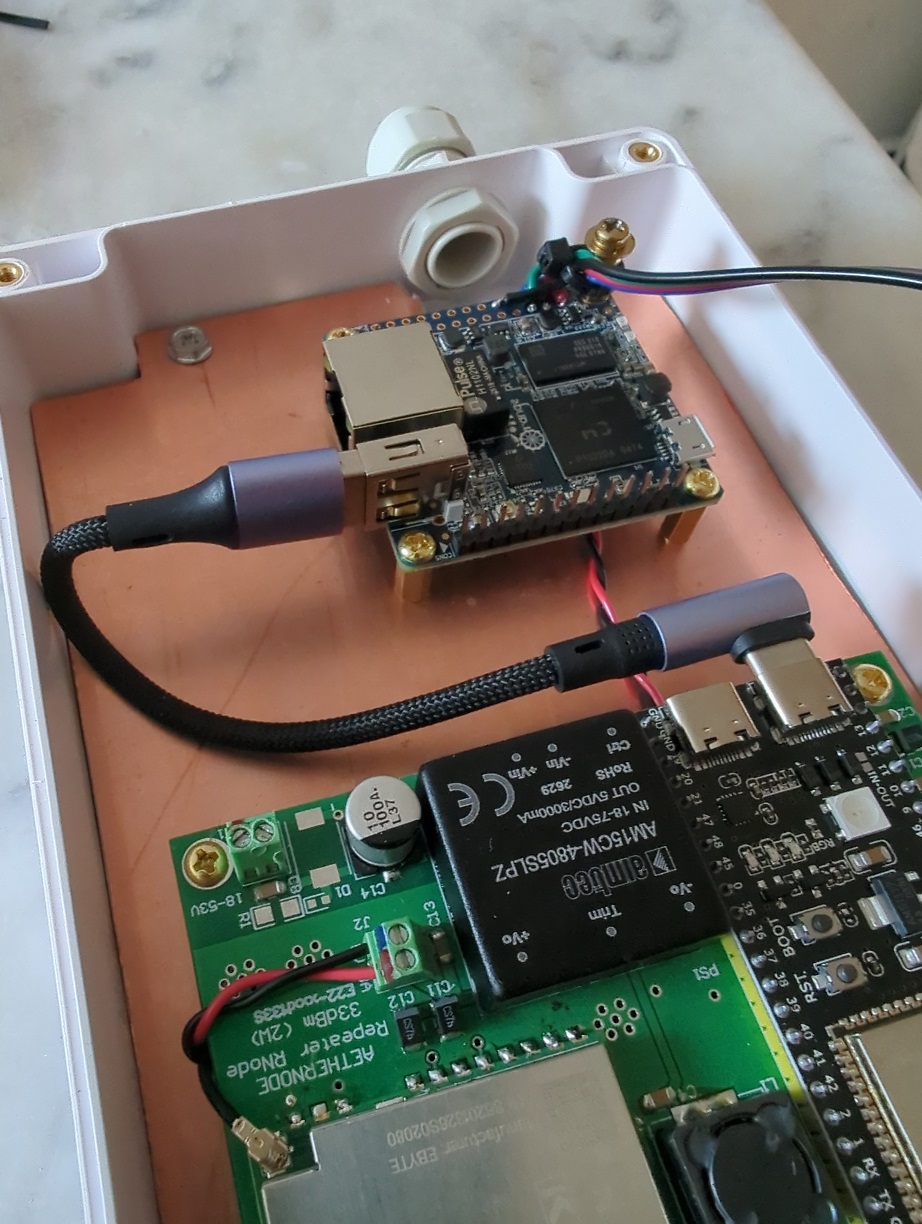
OK, looks, good, SBC off to the soldering iron. 5V wires soldered on bottom side, and I2C line for the environment sensors is on top. Changed one of the mounting screws for another standoff, so I can tie the cables in place. This will prevent any funny business on a roof, when opening the box. I put a bolt and a washer on top, so the tie will not slip off.
IMG_20260912_140801_135.jpg
IMG_20260912_140808_427.jpg
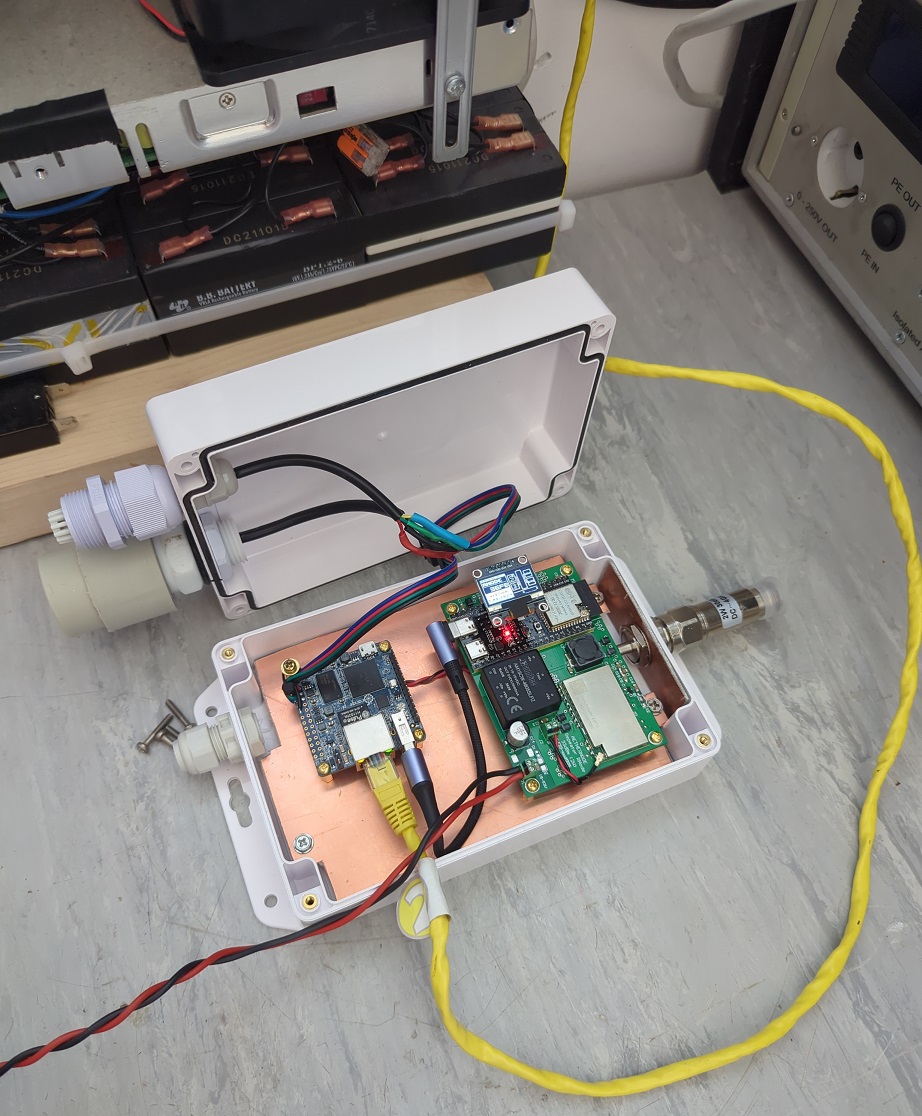
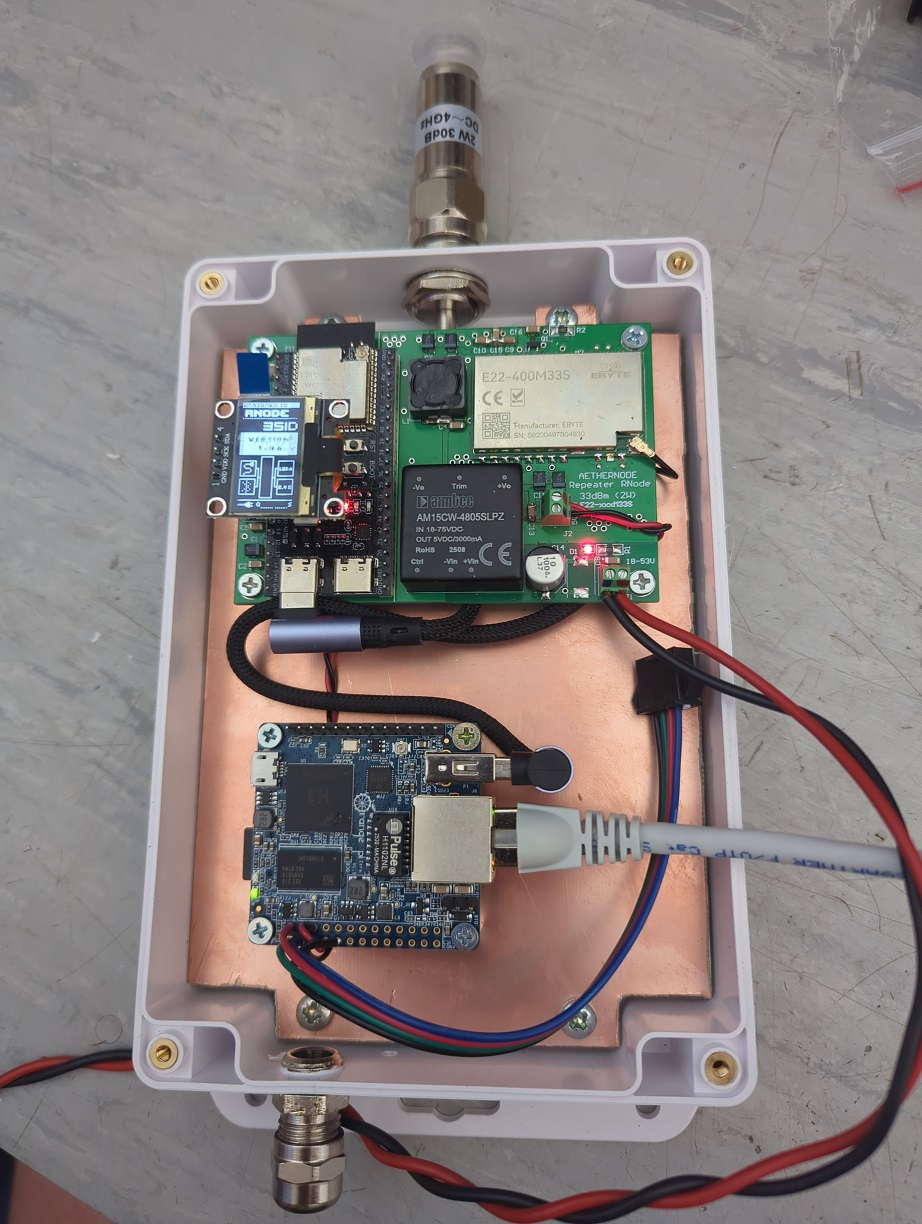
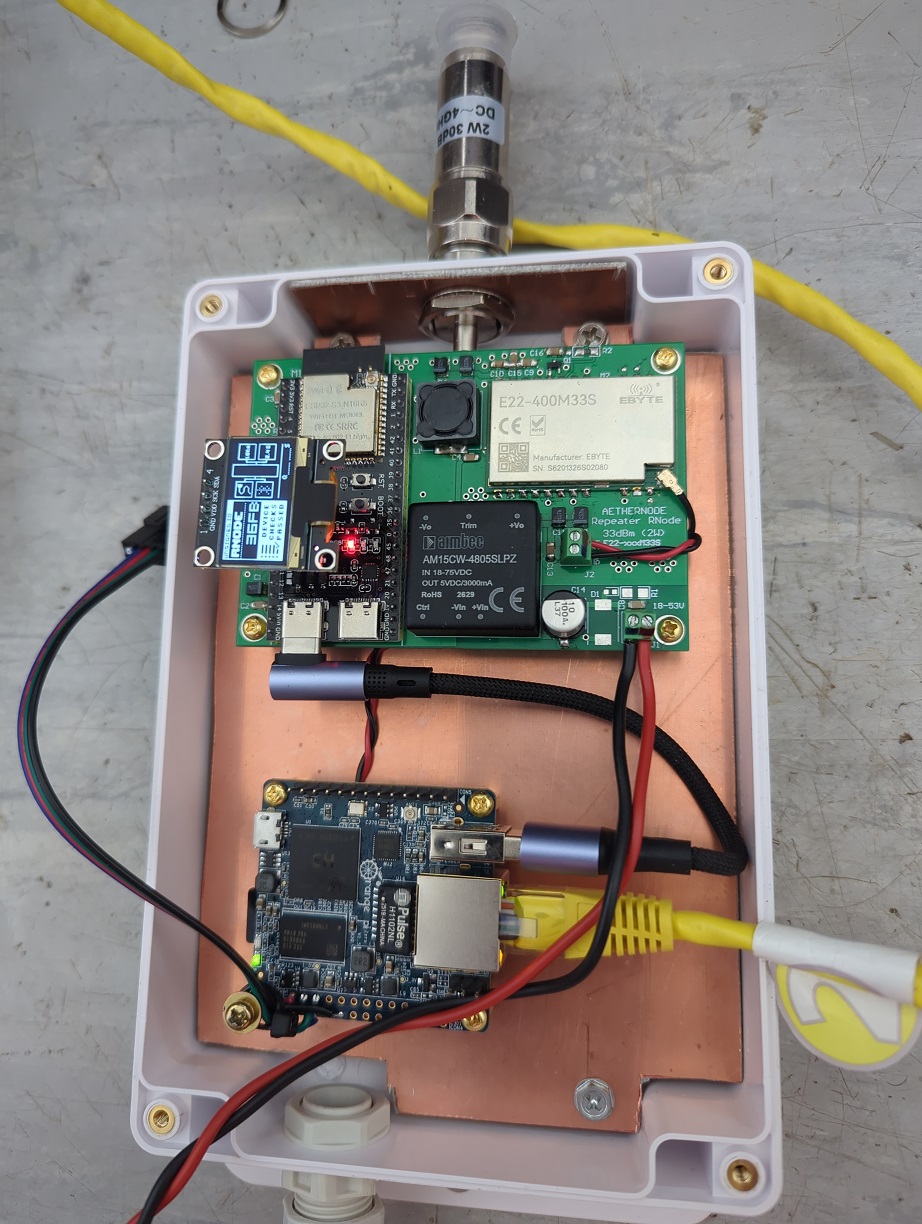
Time to play! I have put a 30dB 2W attenuator in place of the antenna. NEVER run an RNode without an antenna or a dummy load of some kind! It will fry the power amplifier very quickly.
IMG_20260912_143128_883.jpg

  1. Flashed Armbian Trixie
    f560ef73-78fc-430b-8cf9-a27b5f5470c2.png
  2. Set user and pass, did armbian-upgrade.
  3. I want a staic IP, so I can NAT the node out. I deleted /etc/netplan/10-dhcp-all-interfaces.yaml, and added a /etc/netplan/20-static-ip.yaml qith settings. You can see how this is done here: Armbian Networking
  4. Set up the RNS install / update script and ran it.
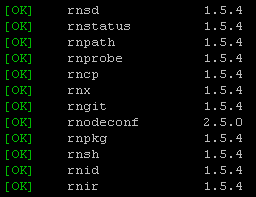
    Untitled.png
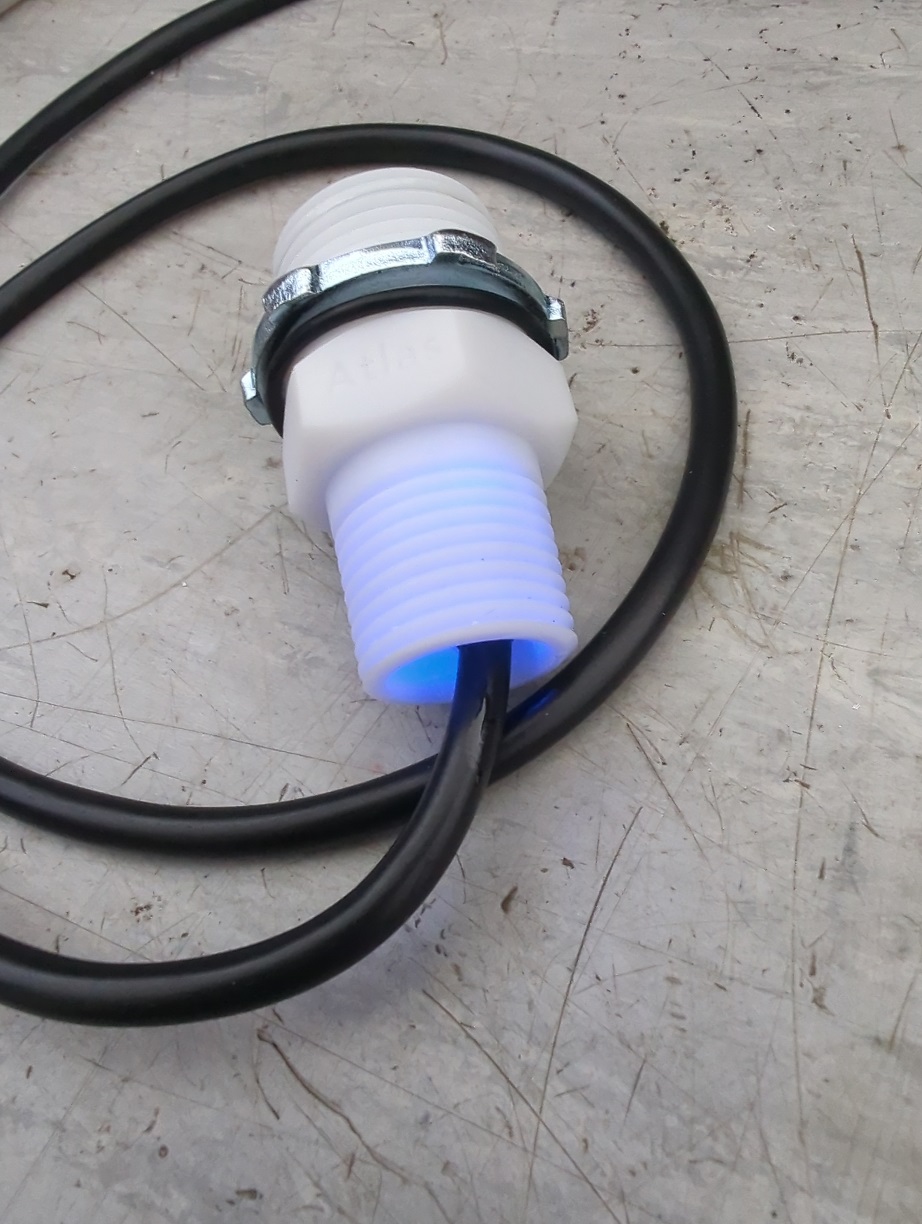
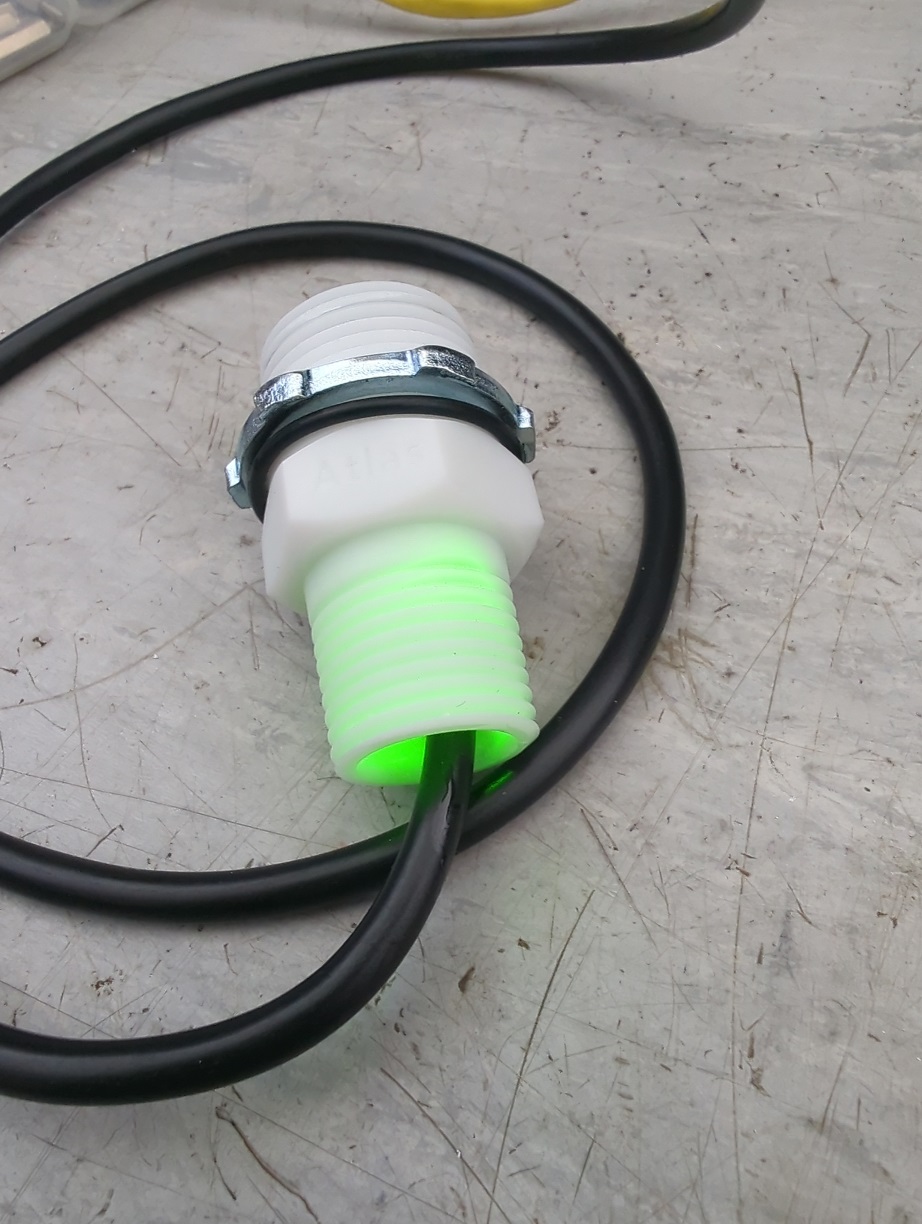
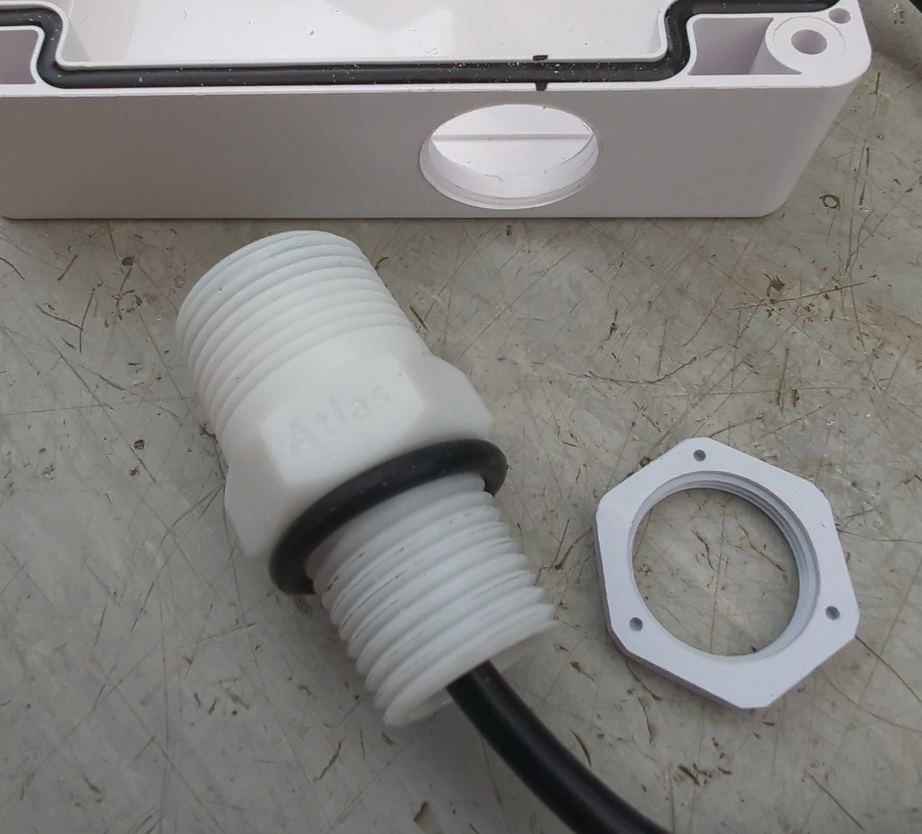
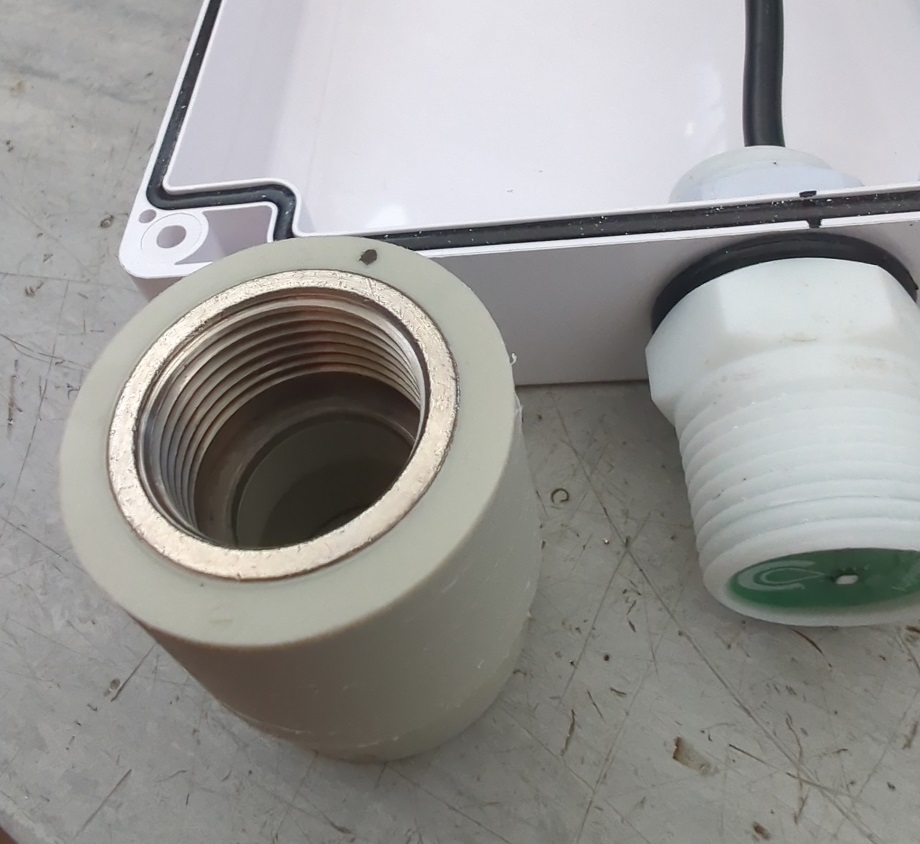
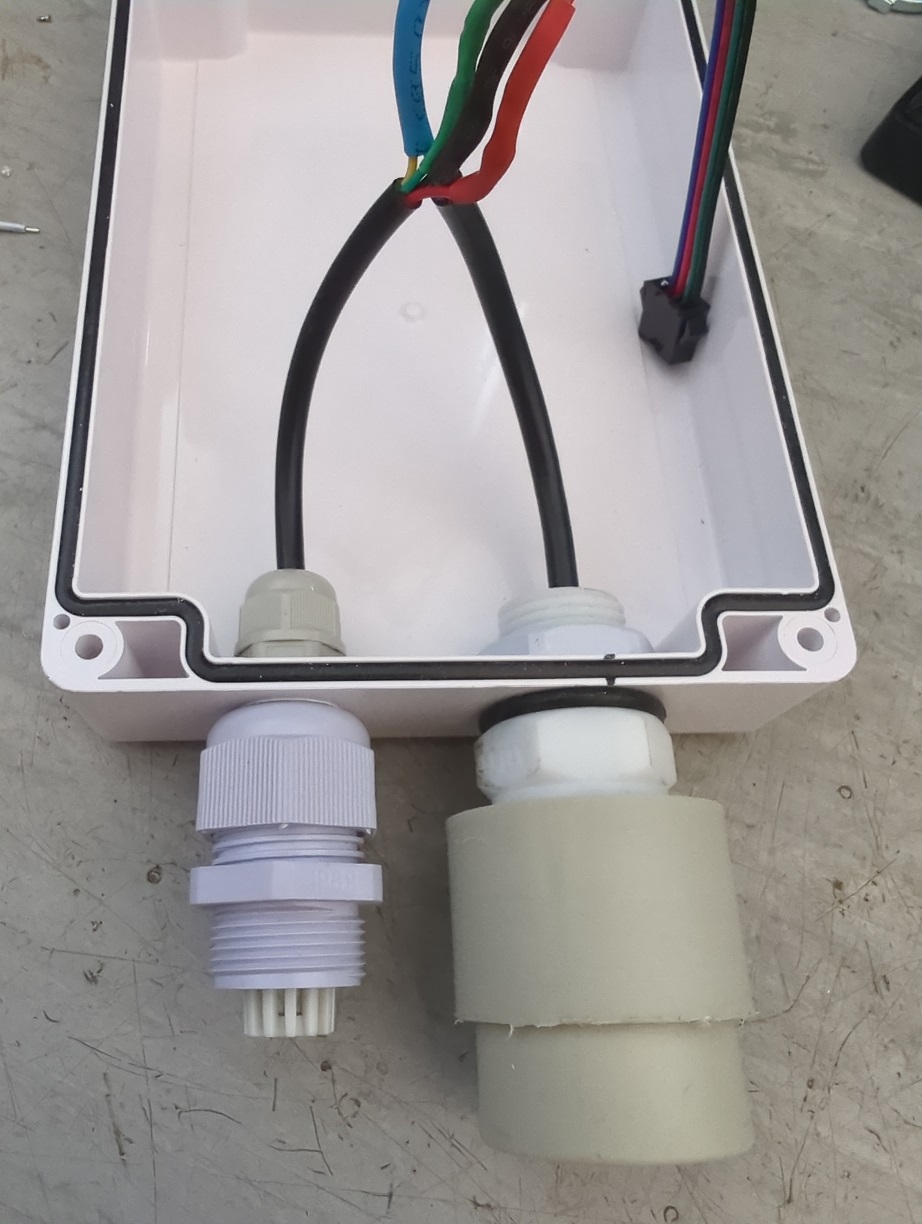
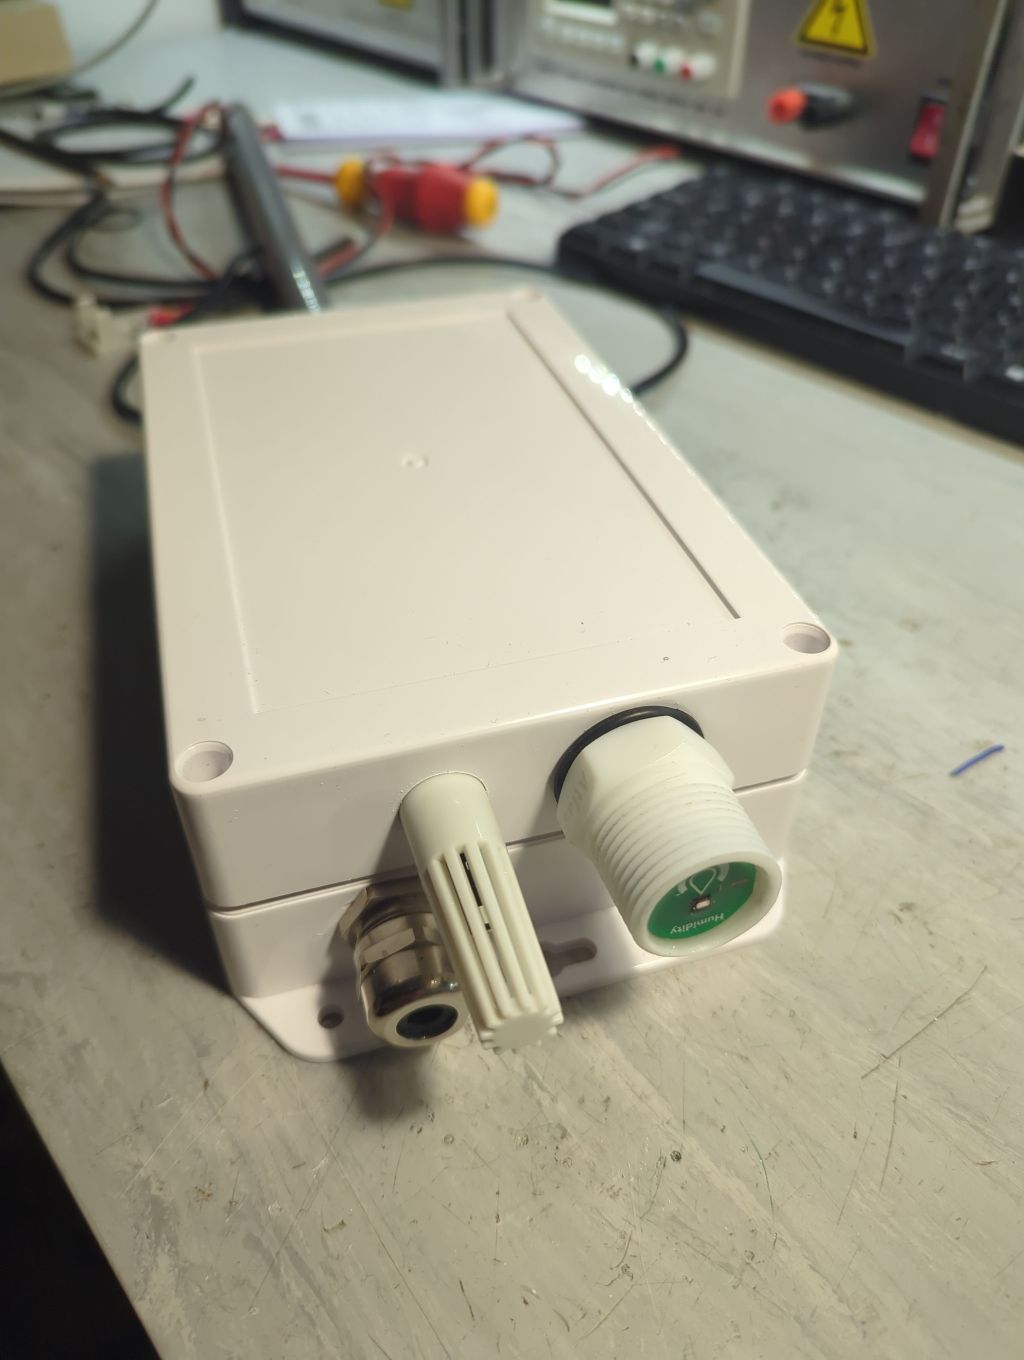
    It's time to set the environment sensors. The EZO-HUM-P-P, aka. Atlas, is for some reason starting in serial mode. It has to be pushed into I2C action, and this is done by shorting two leads and giving it 5V. It transfers from flashing blue, to flashing green and we are done - it can be tied in with a PG13.5 cable gland nut and a rubber ring. It gets a protective shield in the form of a standard 1/2" to 3/4" piping plastic hollender, which my dear colleague at work spun on the lathe and made slimmer. Shit.. it had to be on the left, with the other sensor on the right!!! Mistake two... I have to change the LAN cable gland for a smaller one, because the hollender touches it. Oh well...
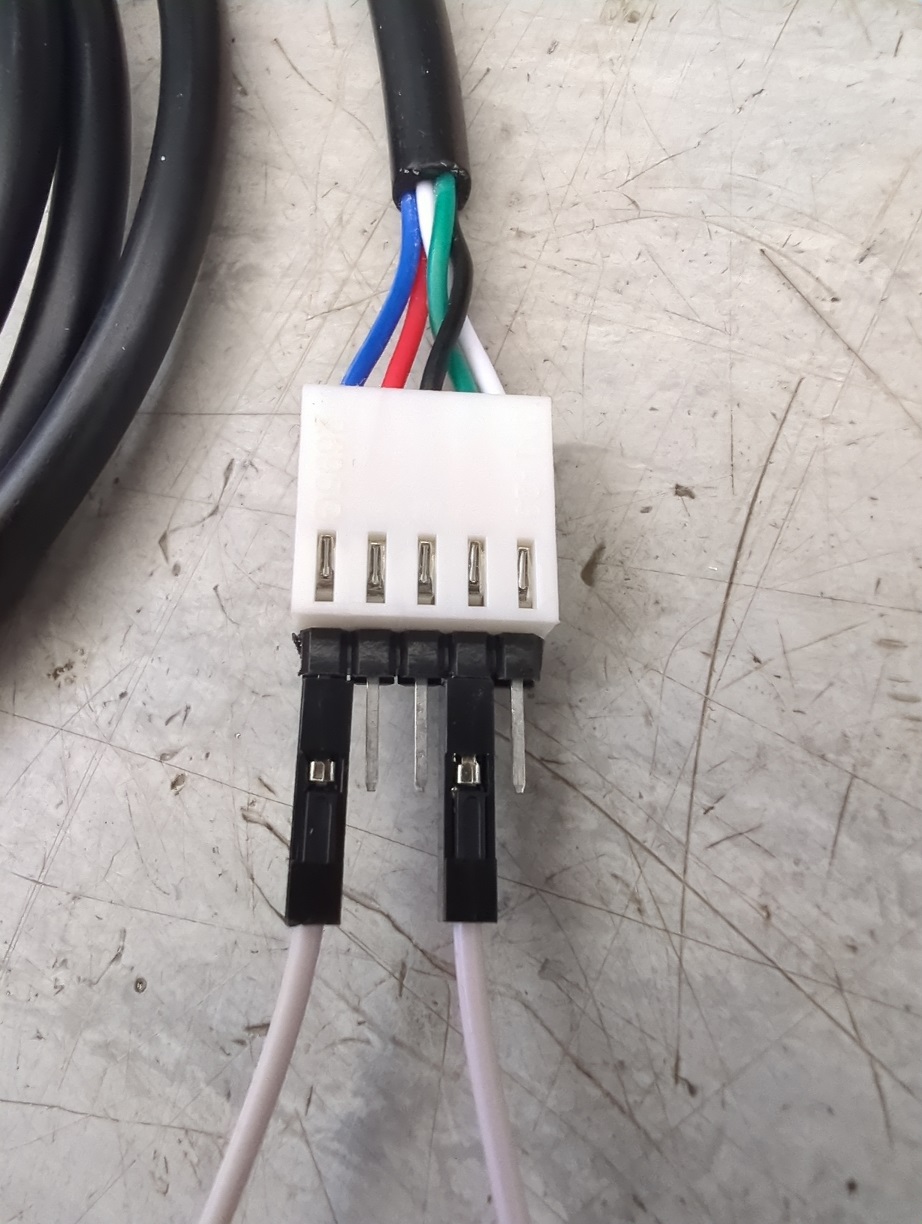
    IMG_20260912_153148_725.jpg
    IMG_20260912_153212_323.jpgIMG_20260912_153227_695.jpgIMG_20260912_154042_715.jpgIMG_20260912_154156_333.jpg
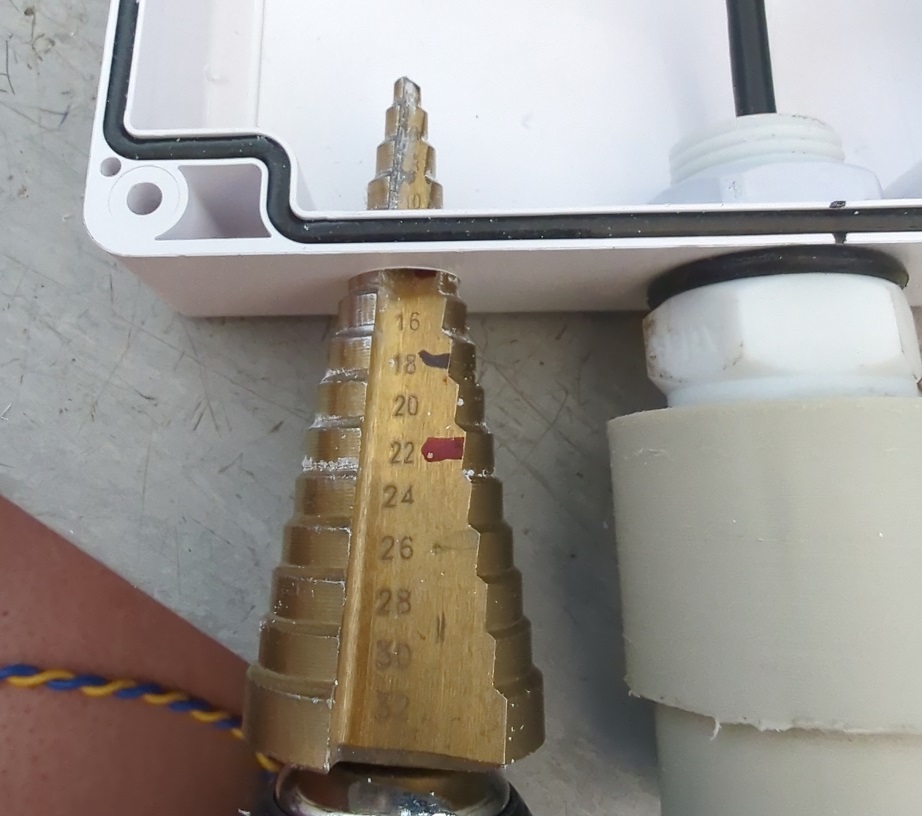
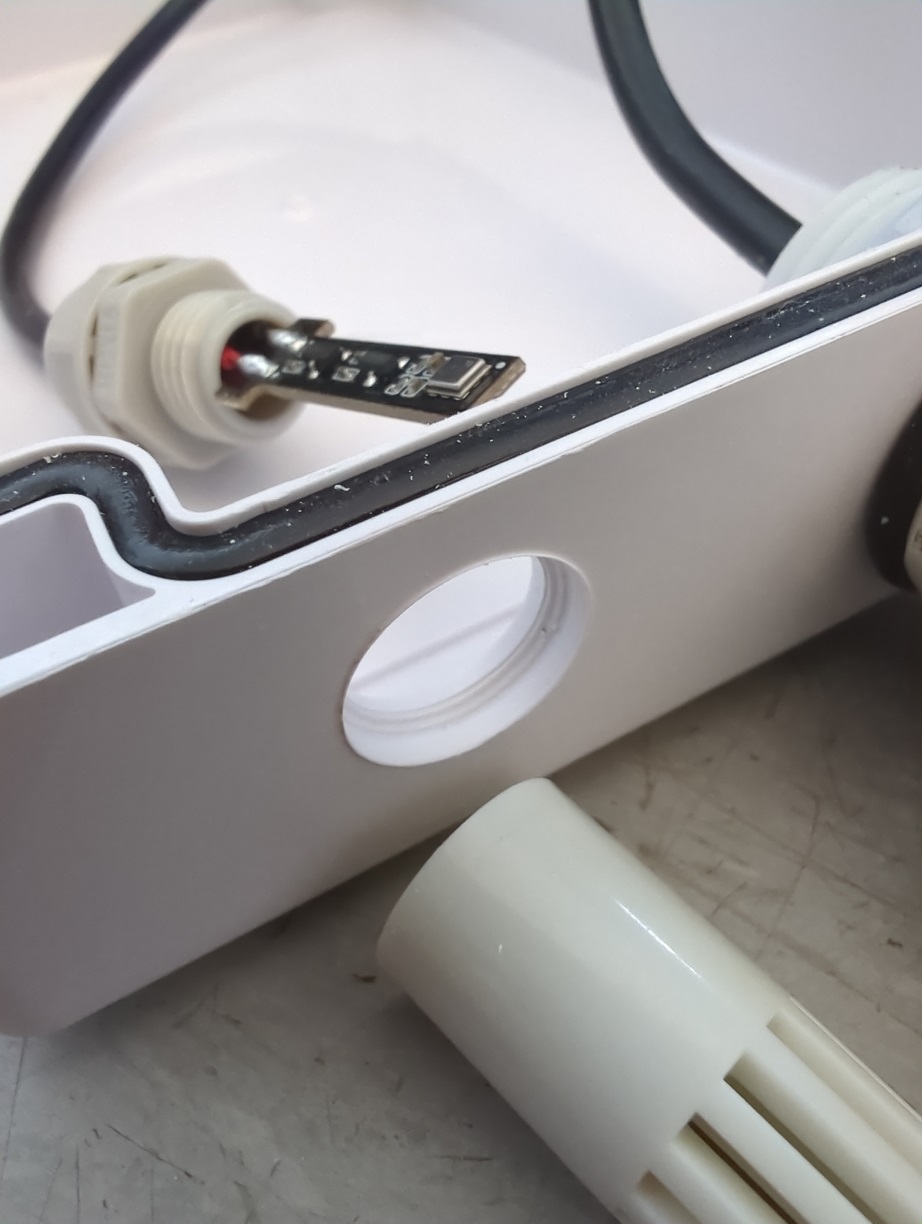
    Now, the TVOC sensor is a piece of work. In order for it to get mounted, I loose all the rubber and drill a very specific hole with my step-drill - 14mm fully in and I start digging with the 16mm face, making a "bed" for the sensor shield. You have to be careful not to fully go trough! Than I press-in the shield and screw the sensor from the inside, held by the small cable gland. Weird, but fully functional way, 4-th node in. I make a cover for the sensor from a PG16 cable gland, from which I have removed the inside rubber grommet and widened a bit the hole on the front, so it can slide over the sensor shield. Works perfectly.
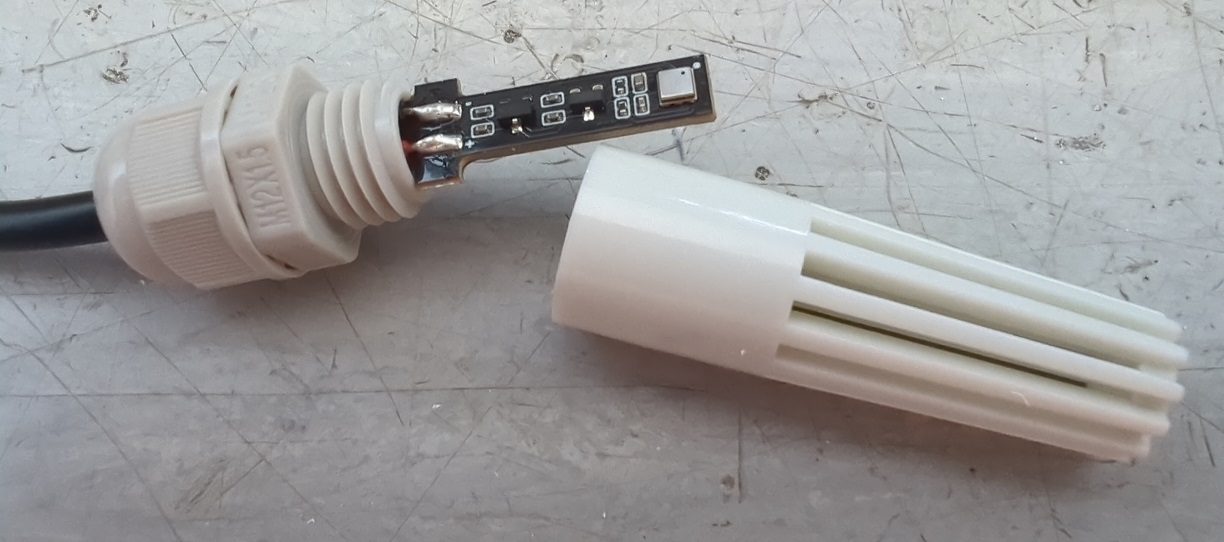
    IMG_20260912_155449_501.jpg
    IMG_20260912_155843_089.jpgIMG_20260912_160029_179.jpg
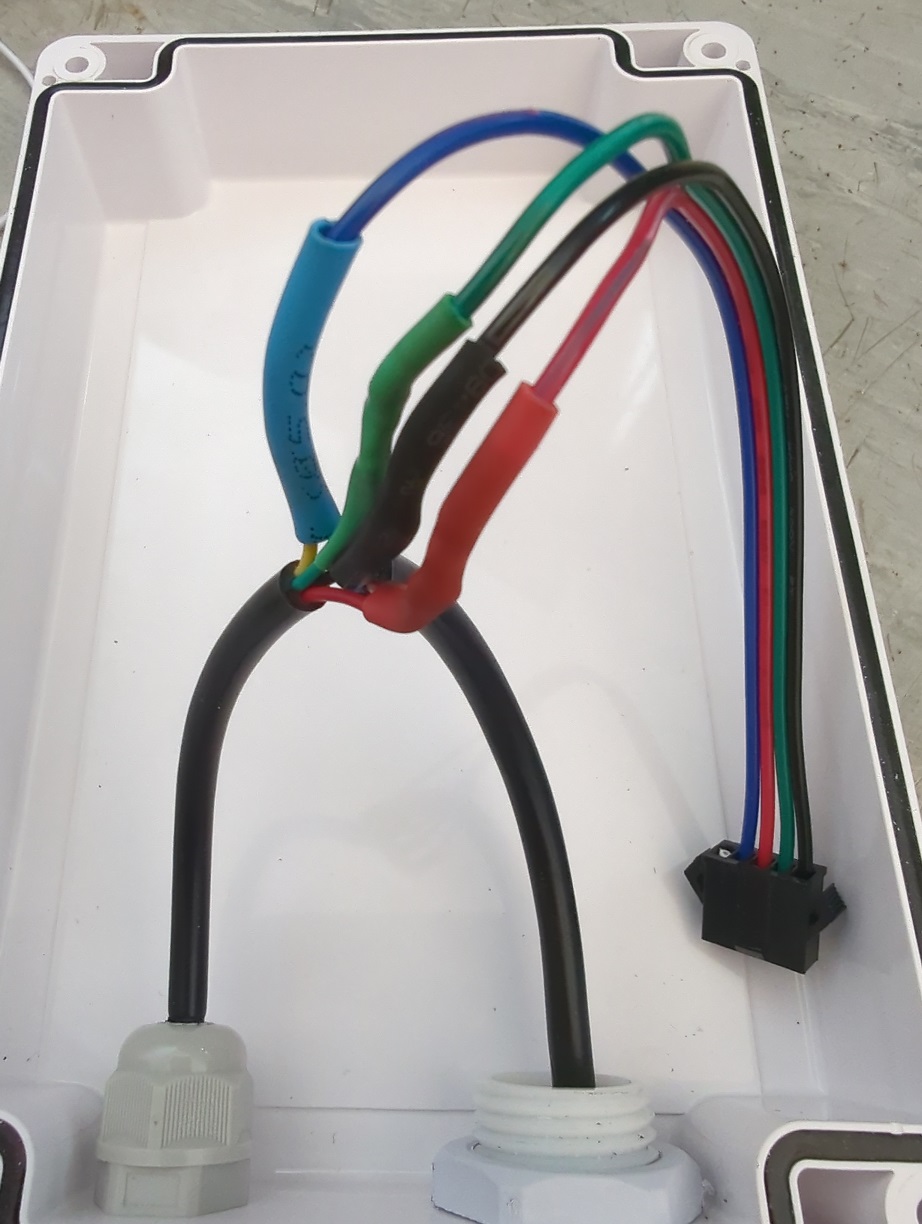
    Next is some soldering and connecting. Now the aethernode is done, and when I2C and YGG is set up, the collector can access the data online.
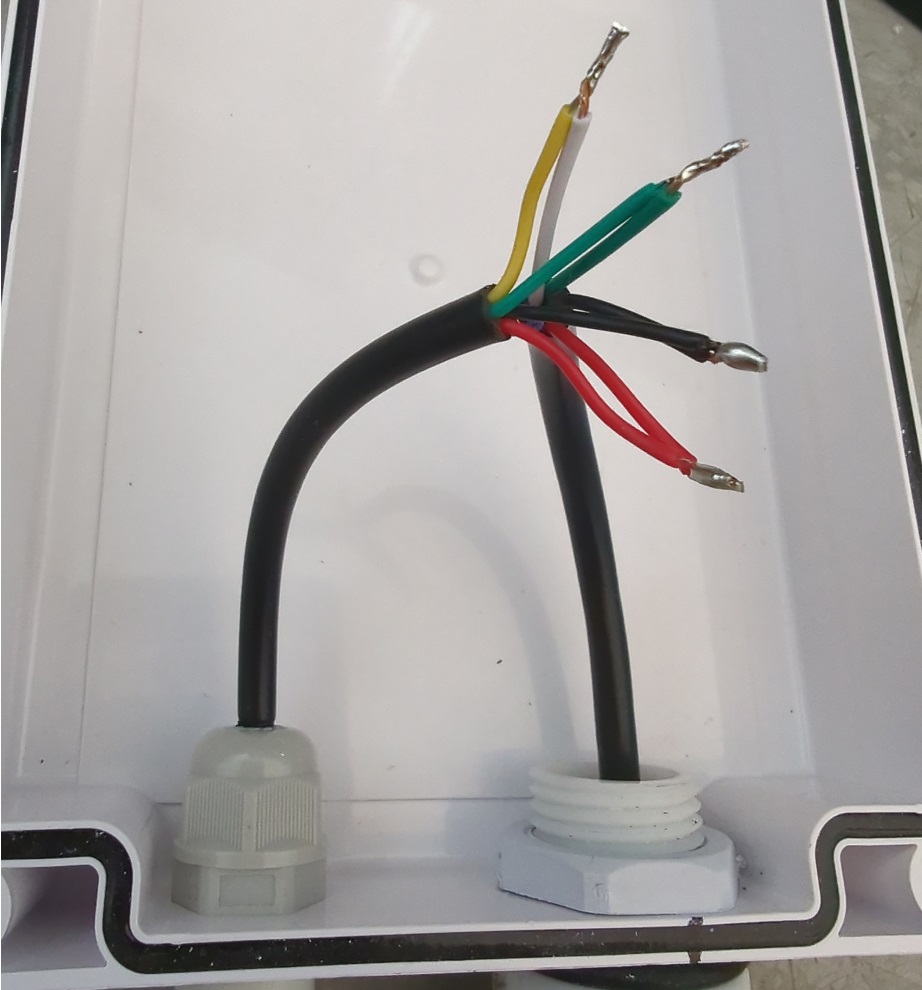
    IMG_20260912_160934_384.jpg
    IMG_20260912_161333_453.jpg
    IMG_20260912_161800_871.jpg
    IMG_20260912_162108_011.jpg


As soon as I get to mounting it in place, I will post pictures and updates!
Cheers!
Bill

Post a Reply

Supports Markdown: **bold**, *italic*, `code`, ```code blocks```, [links](url)

Log in to upload images

Quote
Copied to clipboard